Treatment Plans Crash Course
Learn how to build a treatment plan, add and price procedures, capture patient consent, print a summary, and activate the plan in Invent Medical.
Module Overview & Layout
The Treatment Plan module lives inside a patient's record and lets doctors and clinical staff propose, price, and track a course of treatment from a single screen. Every plan is built around a few core areas:
- Treatment Plans list — every plan created for the patient, with its provider, estimated fees, signed status, and overall status
- Plan Details card — the plan's date, a descriptive title, and a free-text note for context
- Procedures table — each procedure added to the plan, with its own Treatment Details tab (procedure, provider, priority, prognosis, treatment status and timeline, treatment notes) and Billing Details tab (insurance policy, package, price list, billing status, discount, and taxes)
- Patient Signature panel — captures consent directly on screen or via a connected signature device
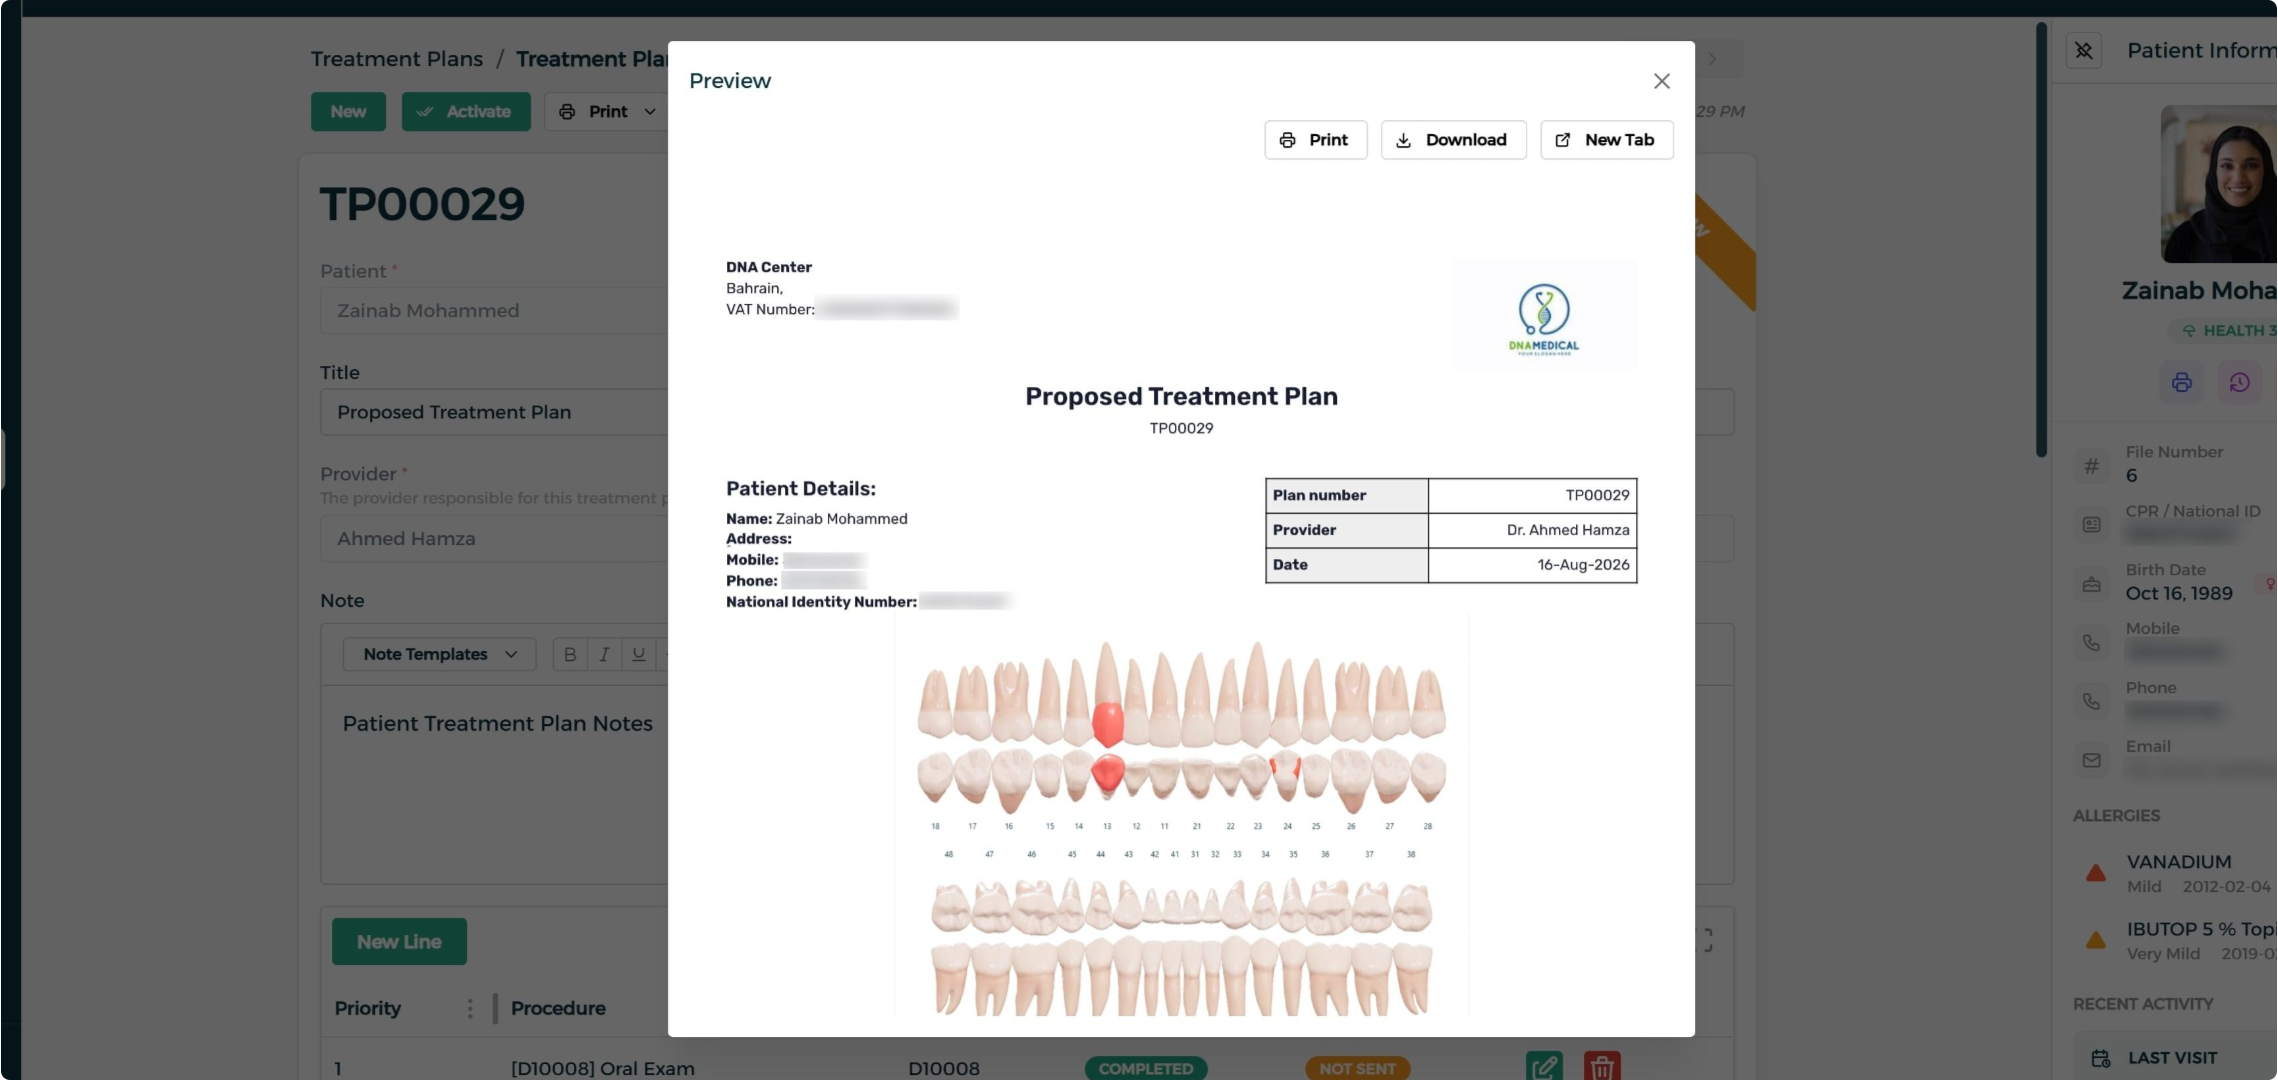
- Print & Preview — generates a downloadable or printable plan summary, optionally including the dental chart
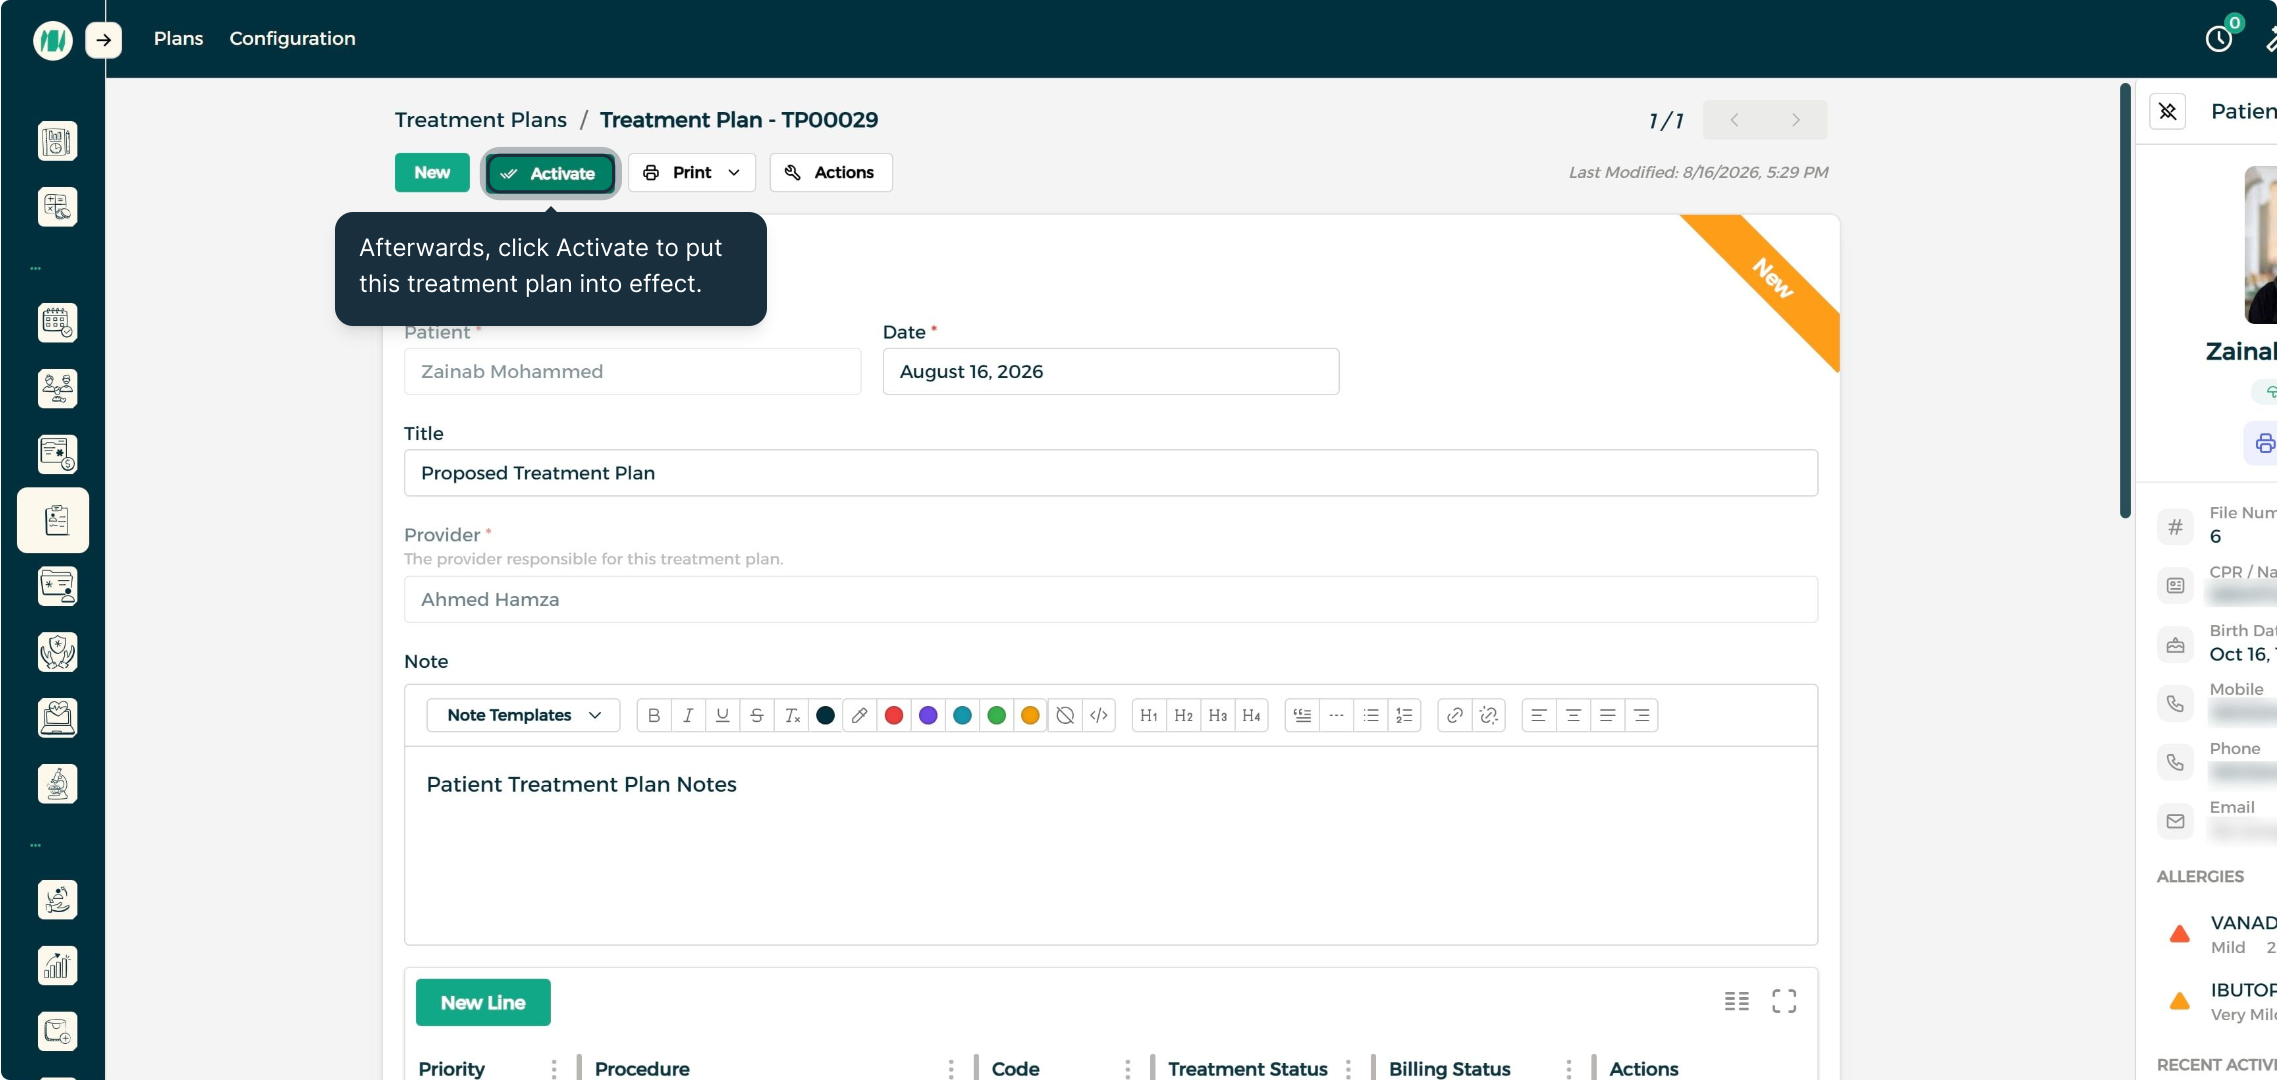
- Activate action — marks the plan as accepted and puts it into effect
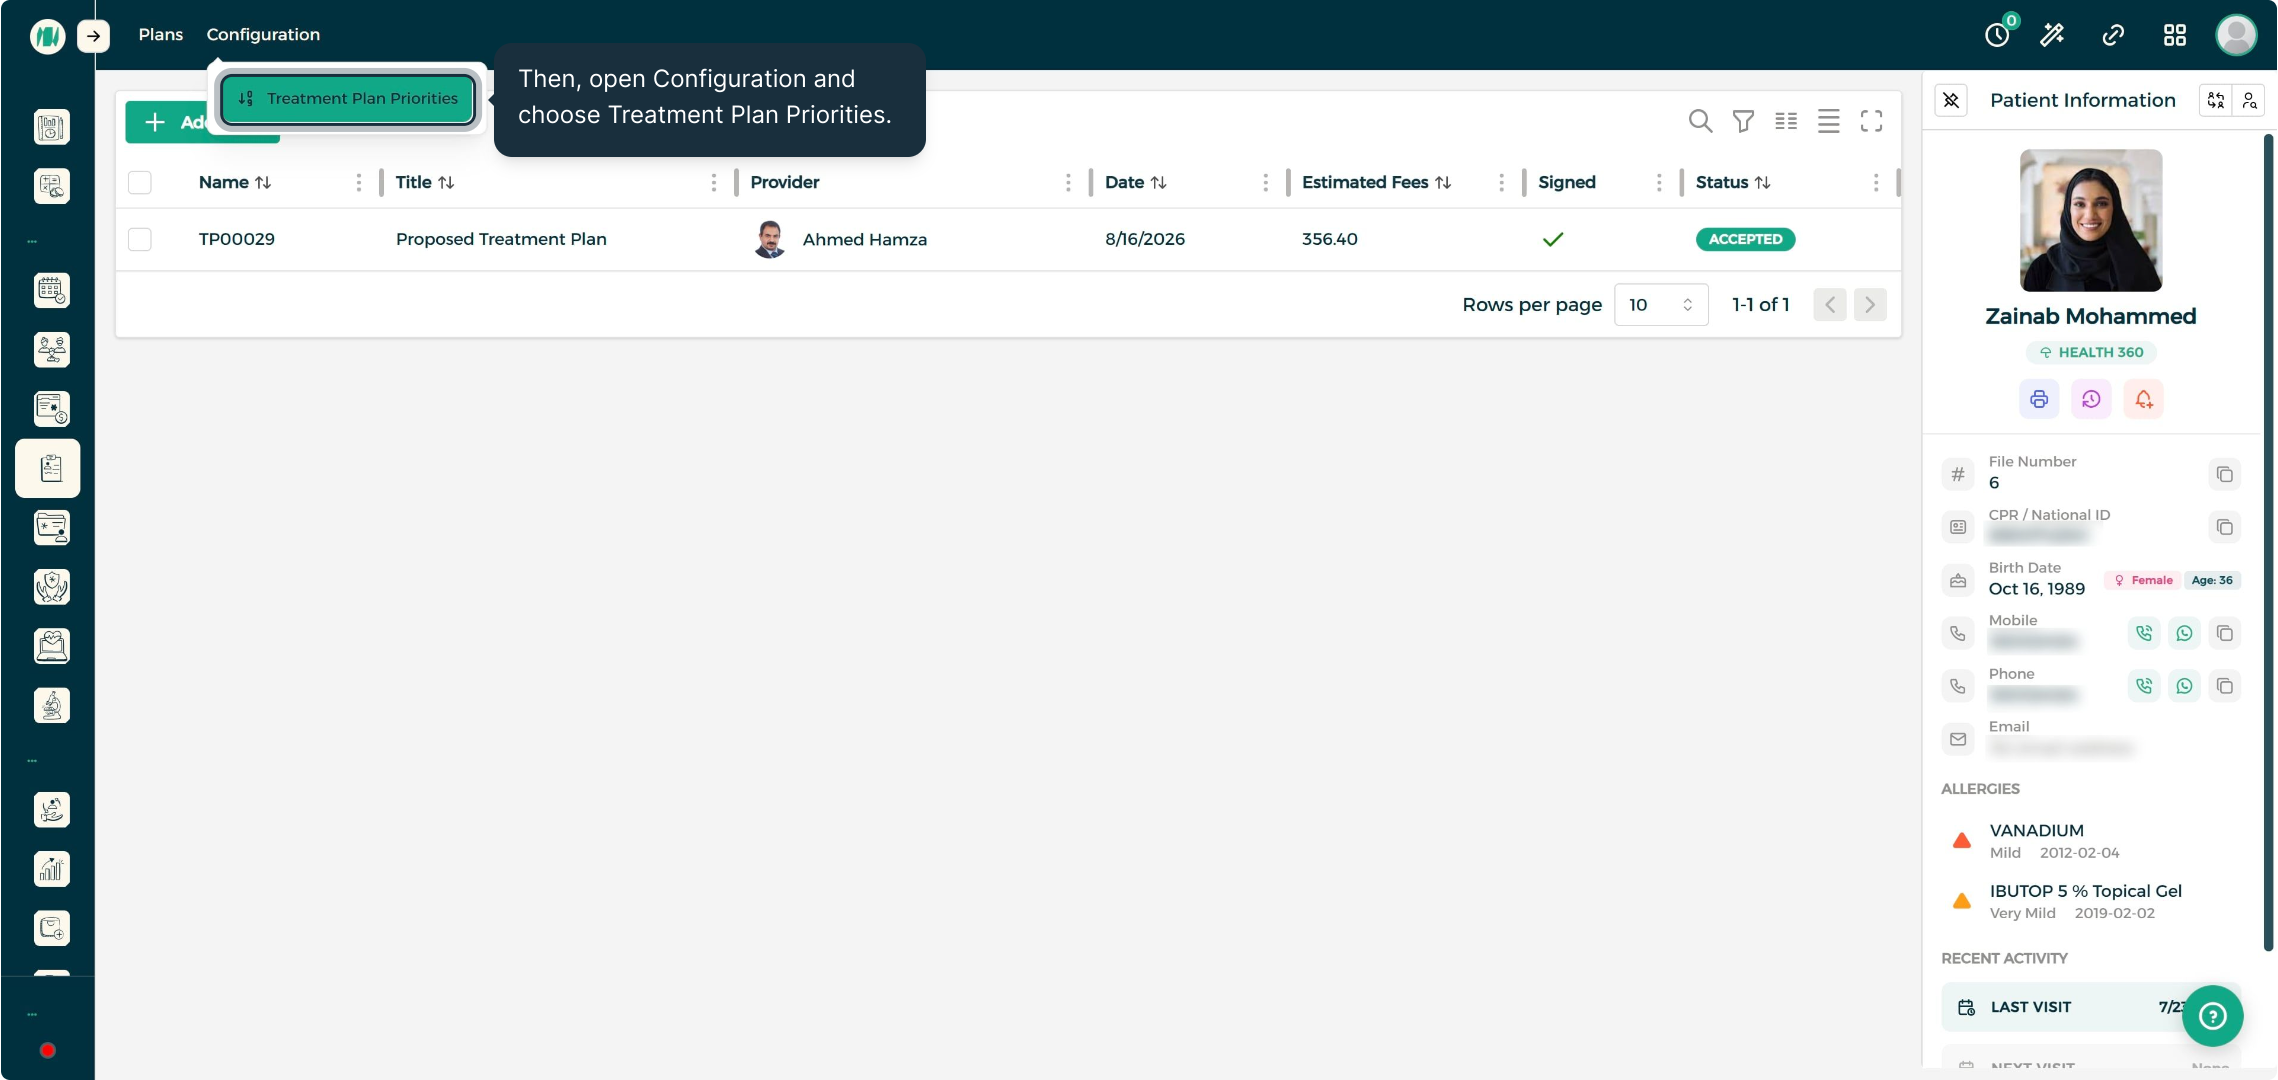
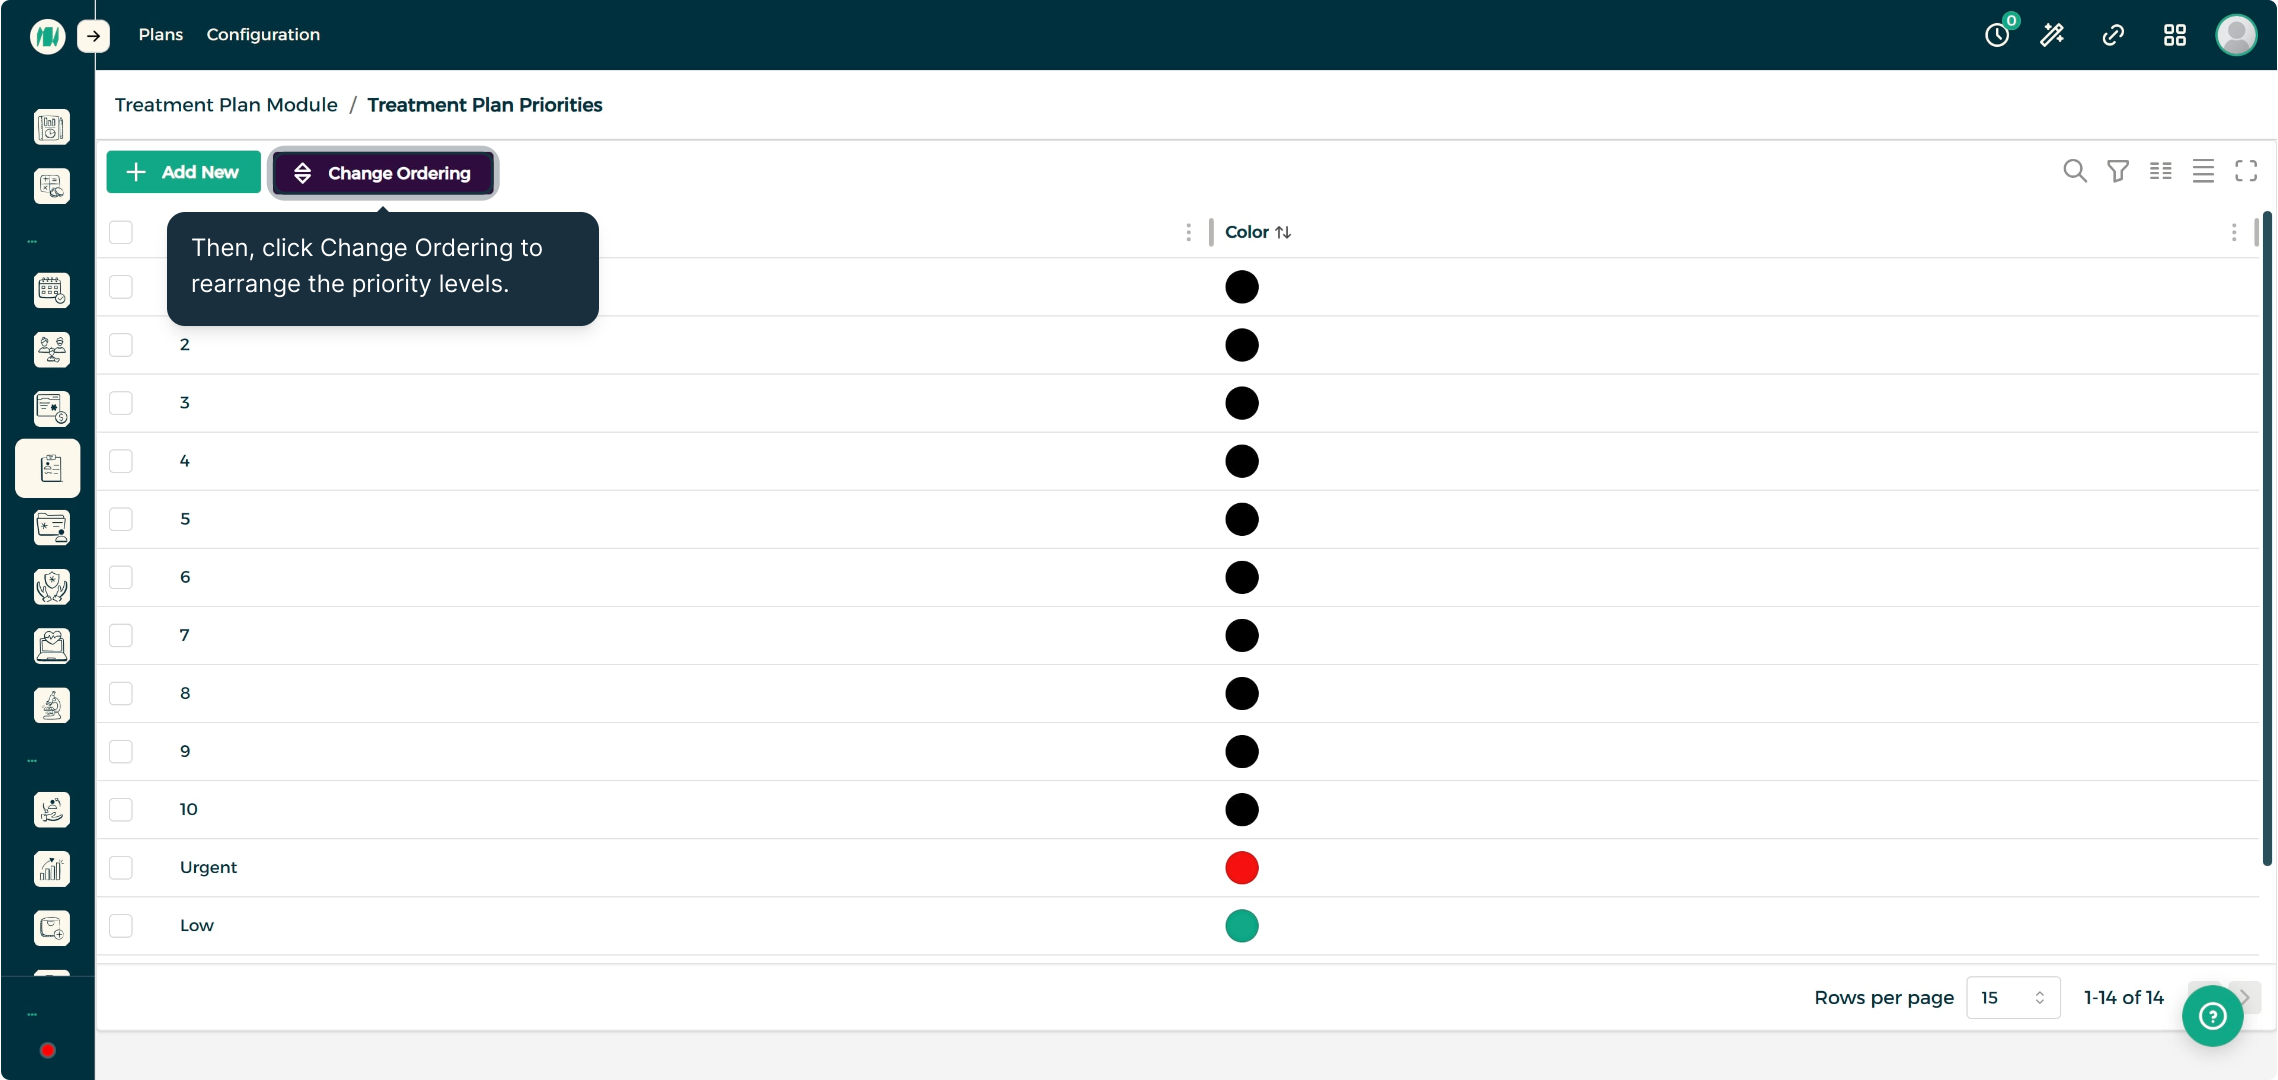
- Treatment Plan Priorities (Configuration) — a clinic-wide list of custom priority labels used to sequence procedures
Together, these let a provider go from a blank plan to a signed, priced, and activated treatment plan without leaving the patient's chart.
Step-by-Step Process
Creating a Treatment Plan
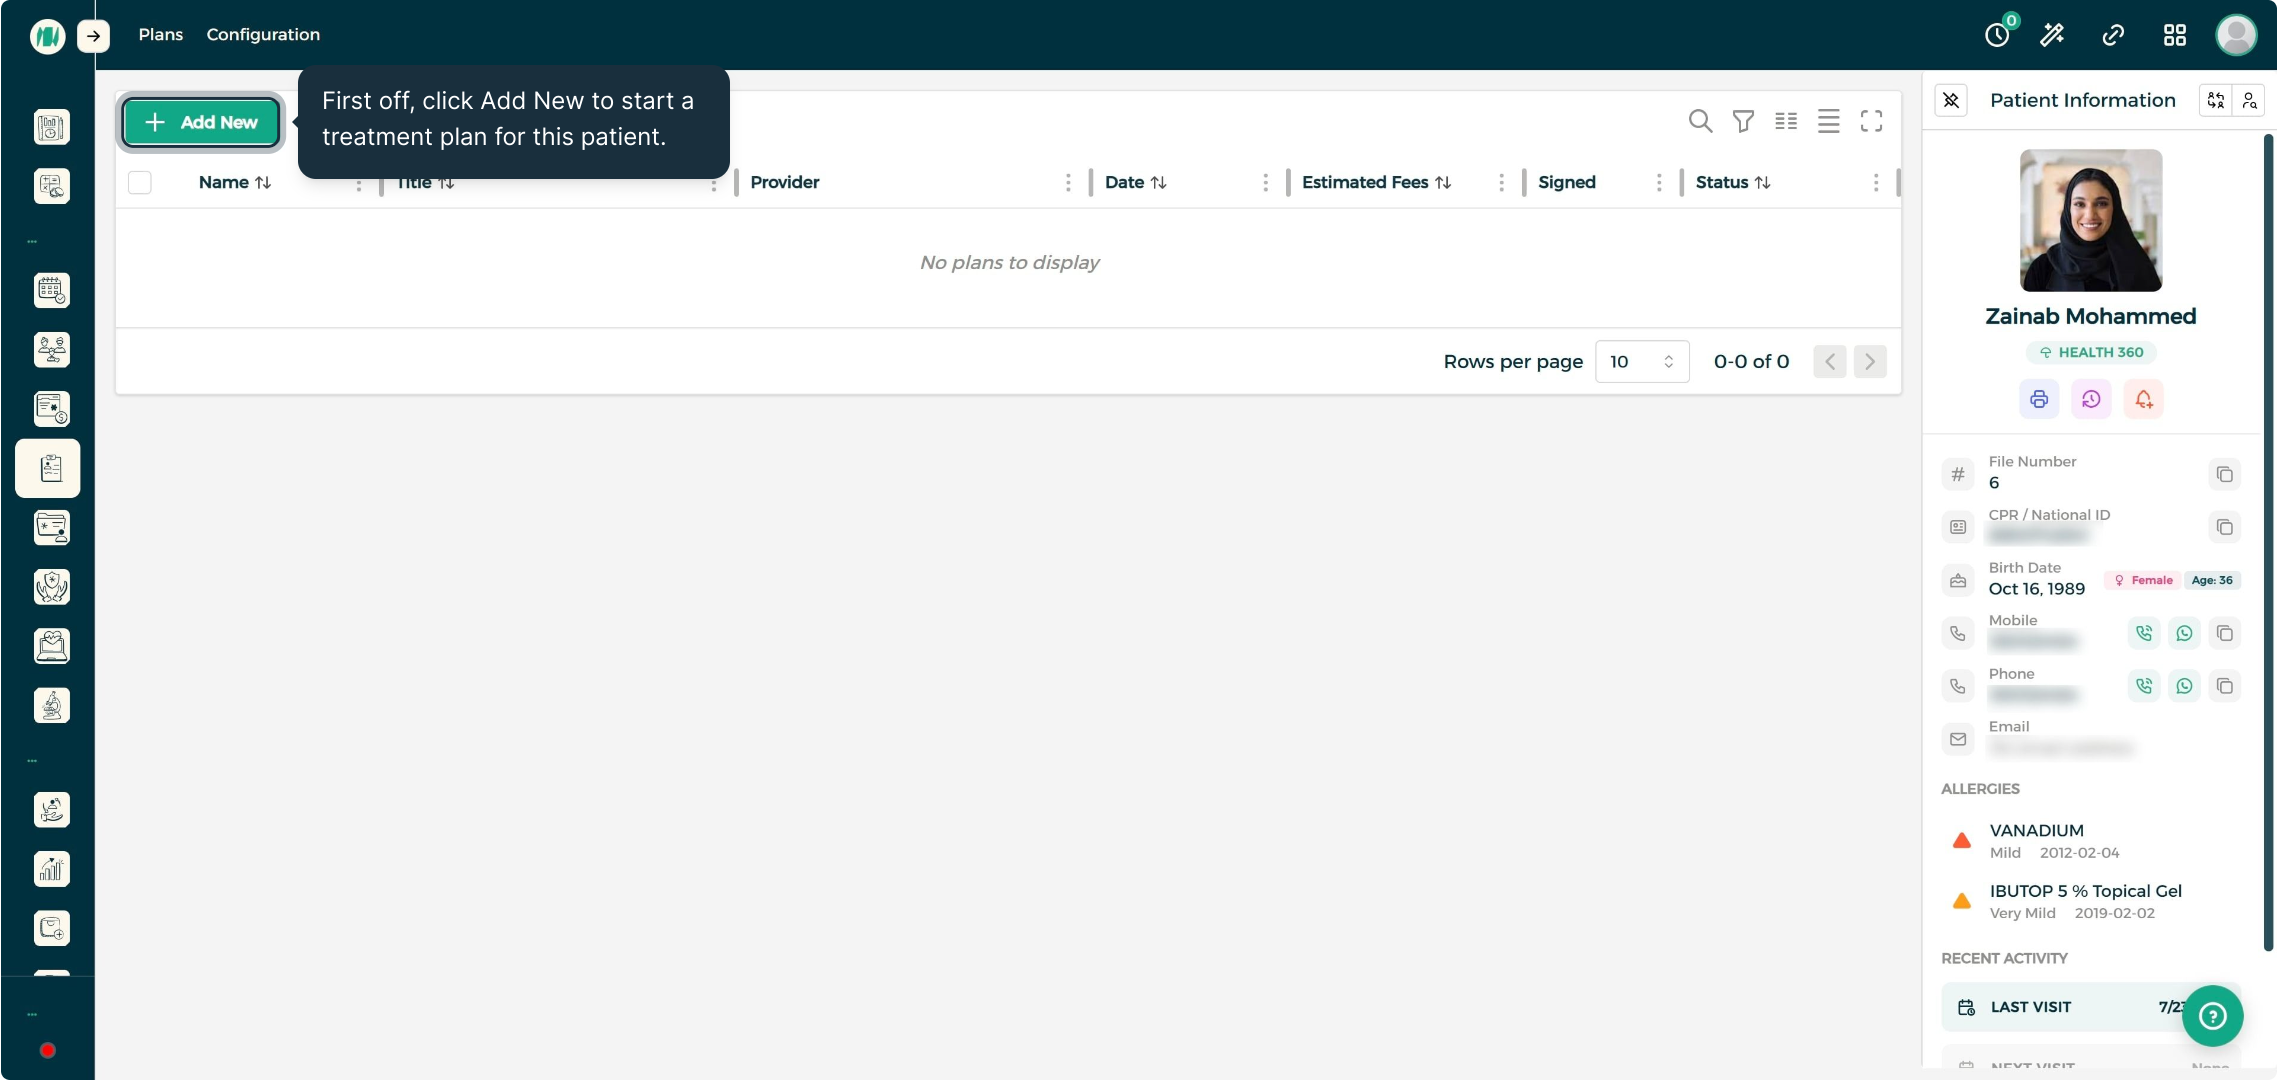
Step 1: Start a New Plan
From the patient's Treatment Plans tab, click Add New to open a blank plan for that patient.
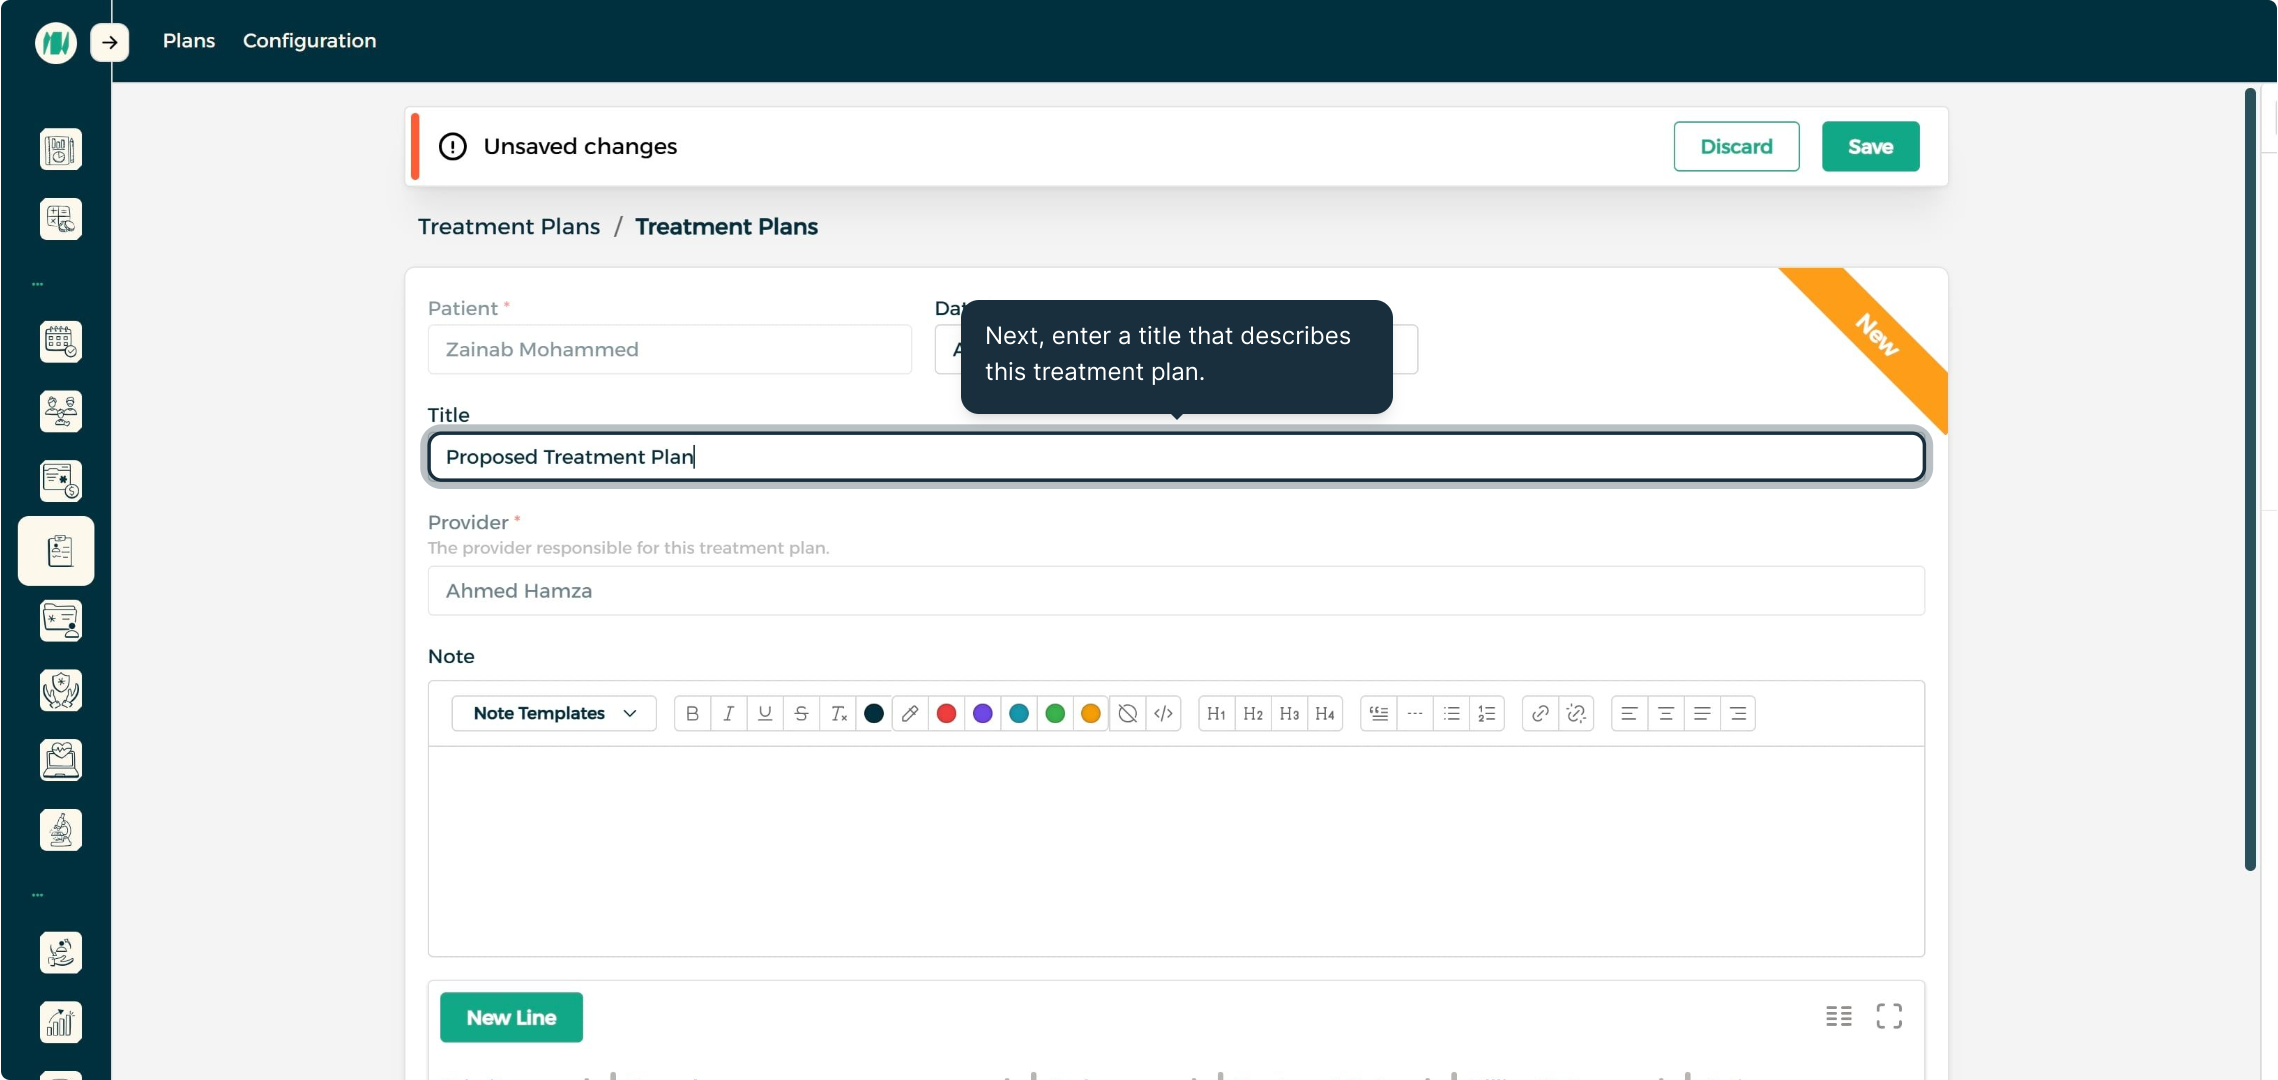
Step 2: Enter the Plan Details
Set the plan date and give it a descriptive title so it's easy to recognize later.
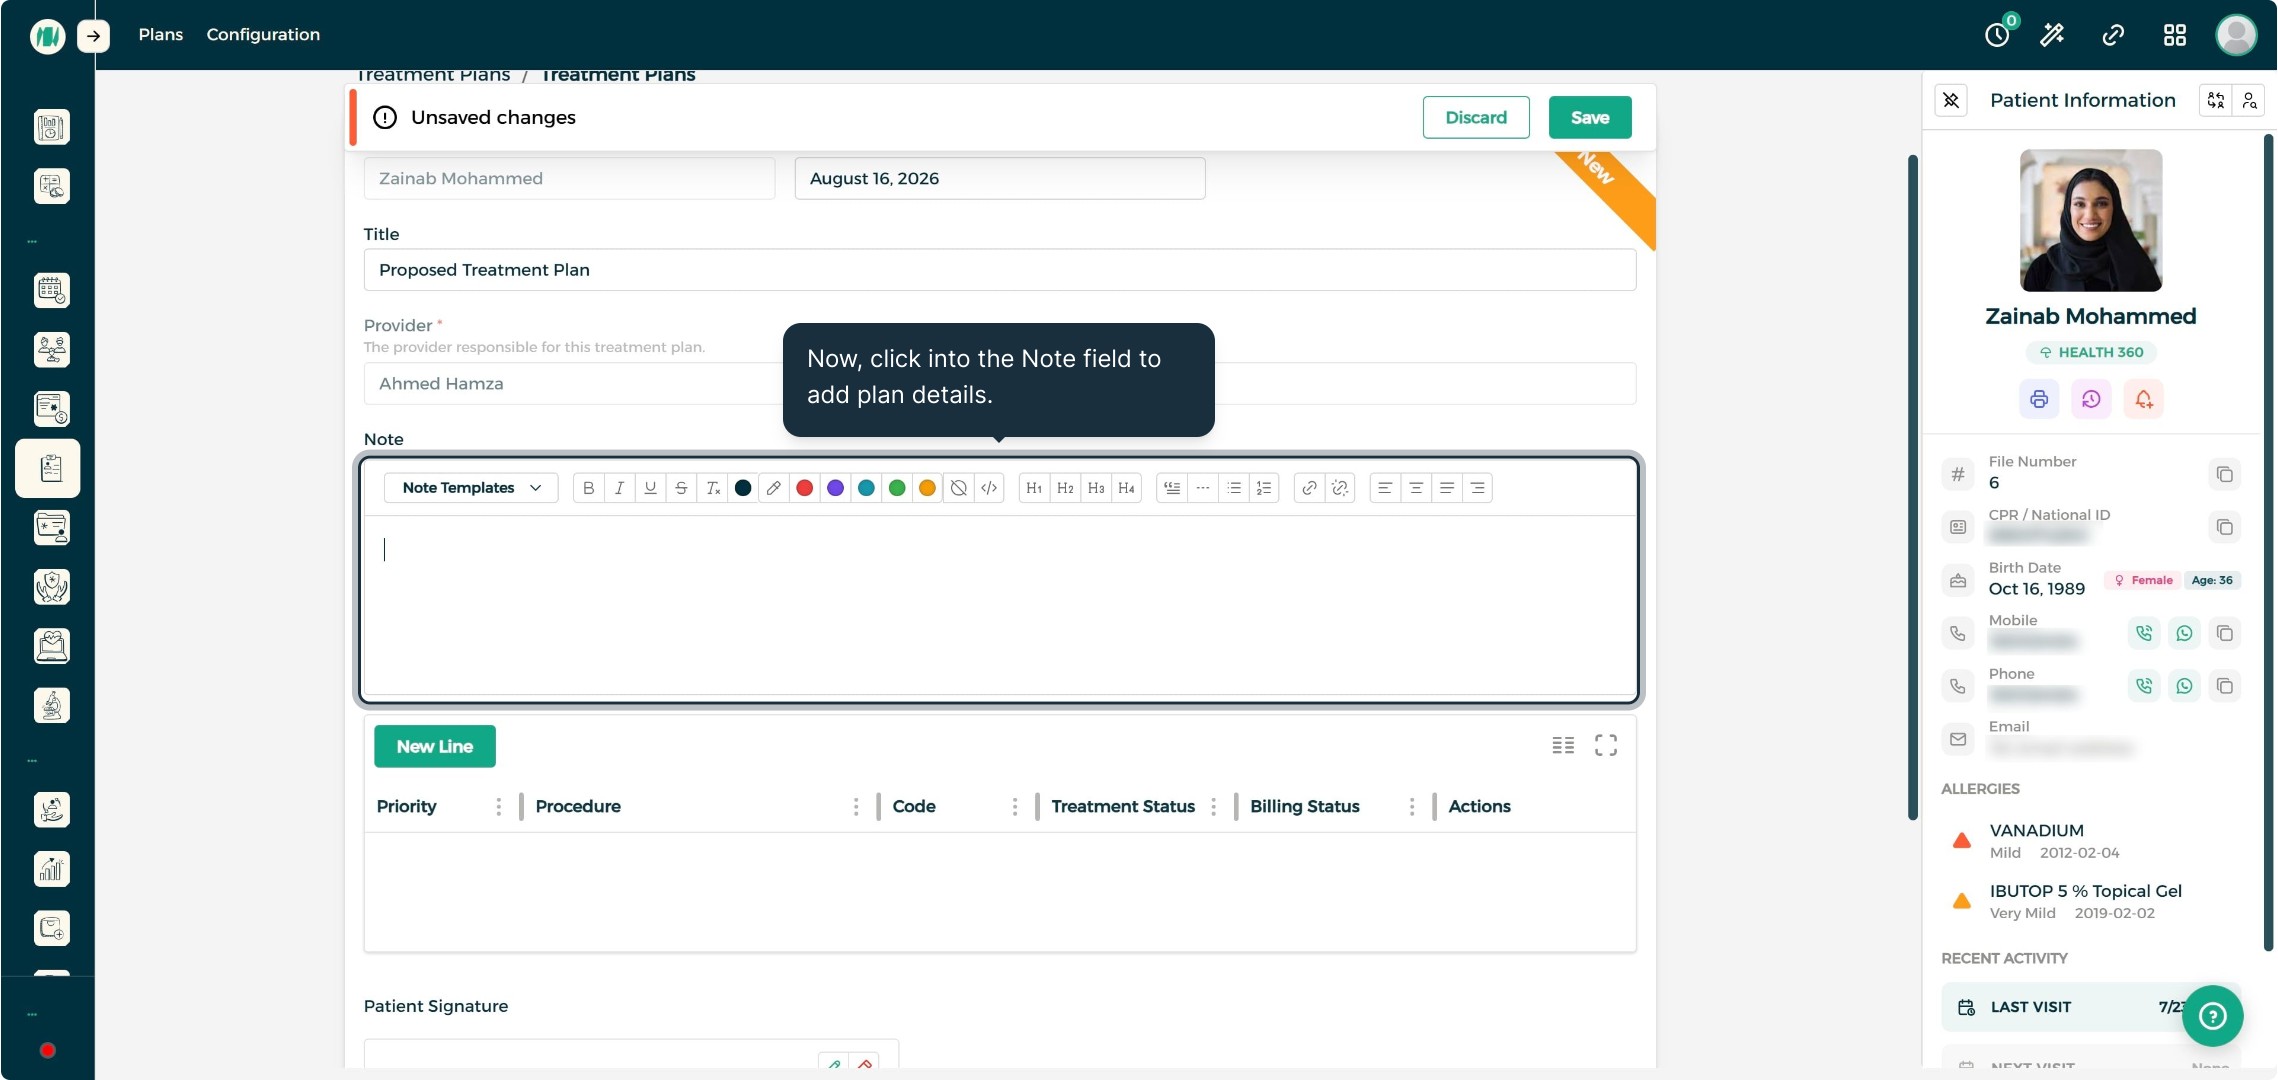
Step 3: Add Plan Notes
Click into the Note field to capture the context behind the plan, or load a predefined note from Note Templates.
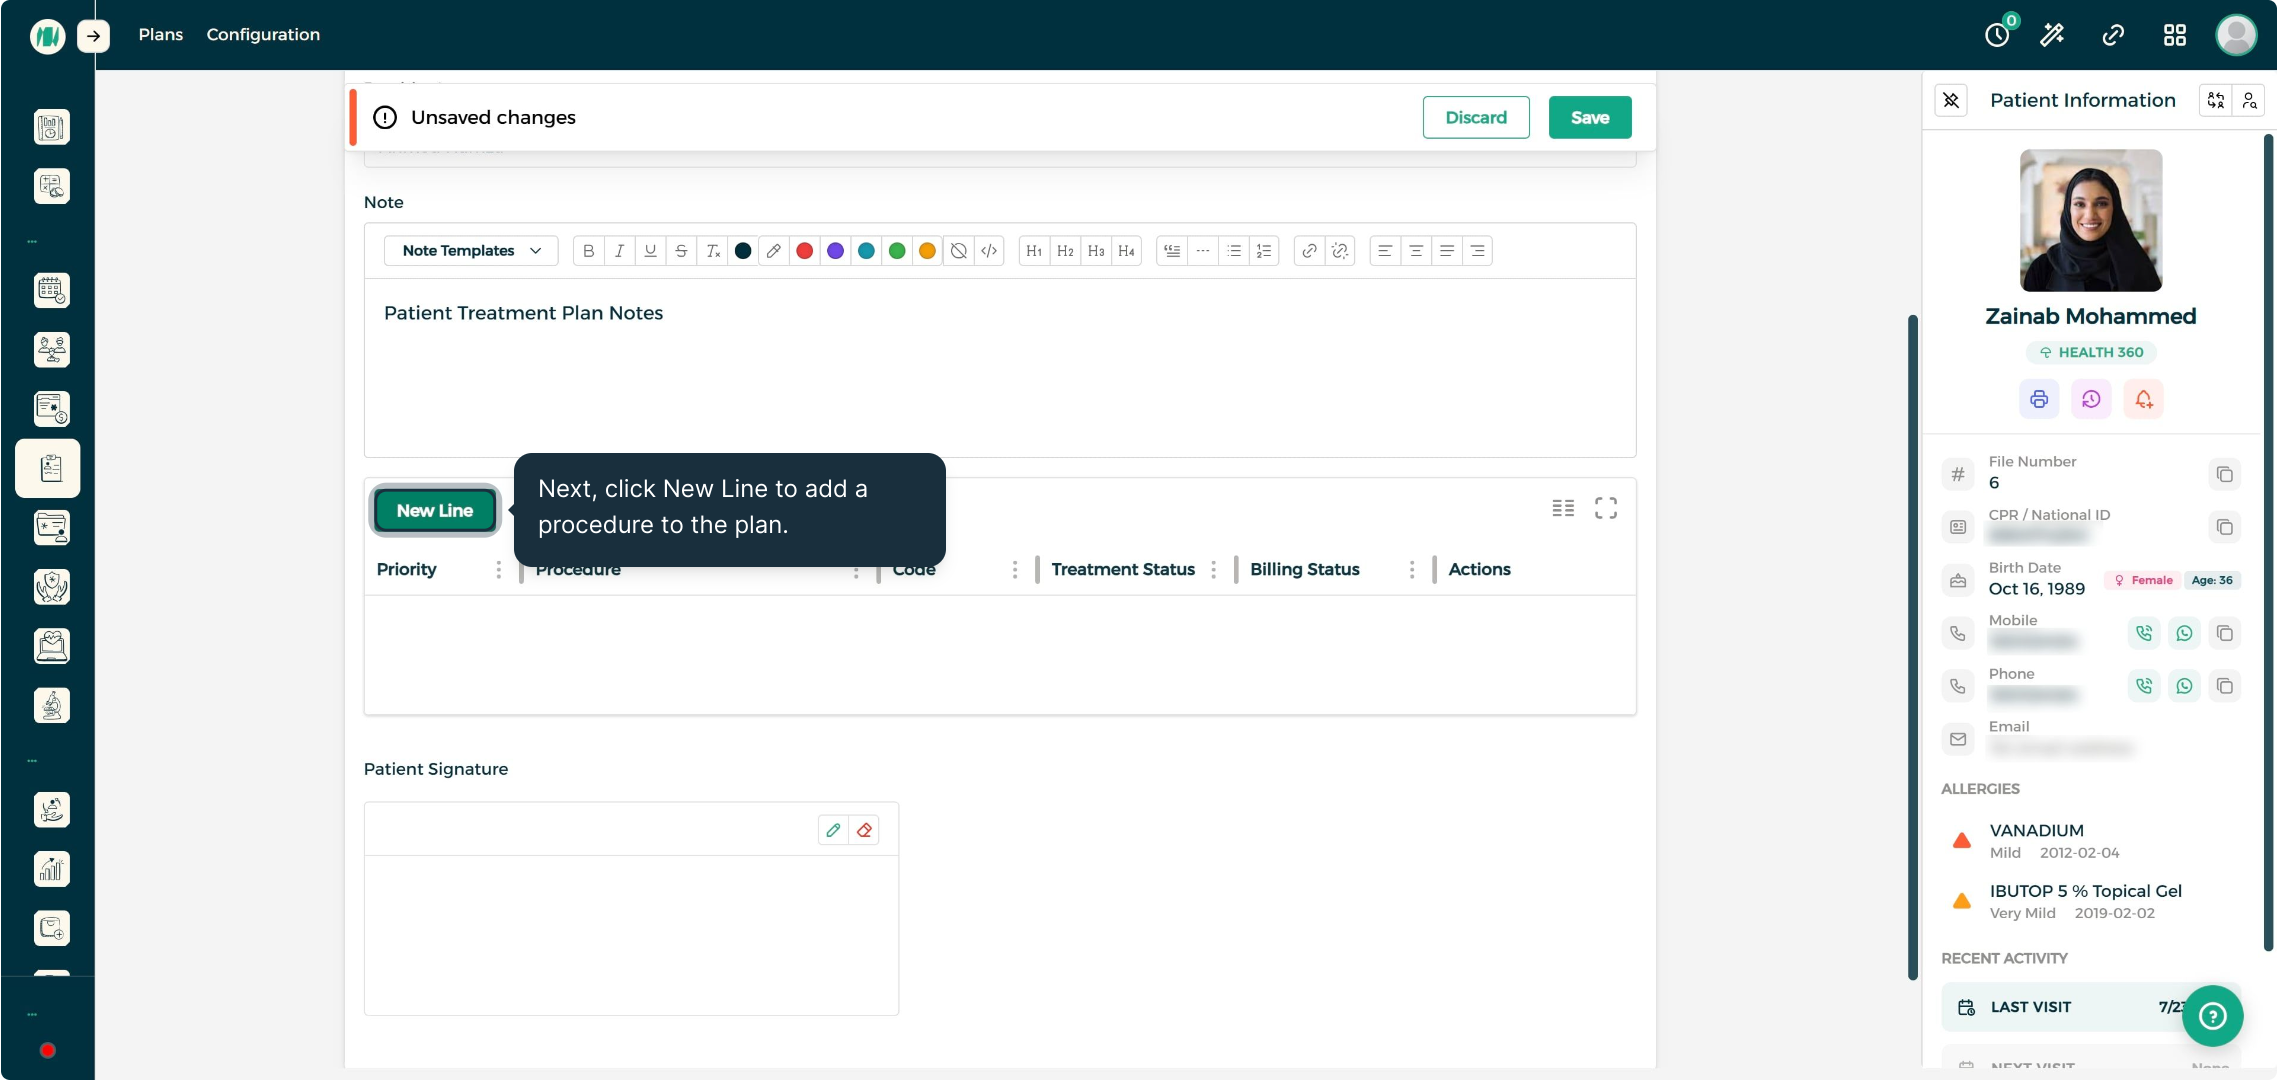
Adding Procedures — Treatment Details
Step 1: Add a Procedure Line
Click New Line to open the procedure editor for this plan.
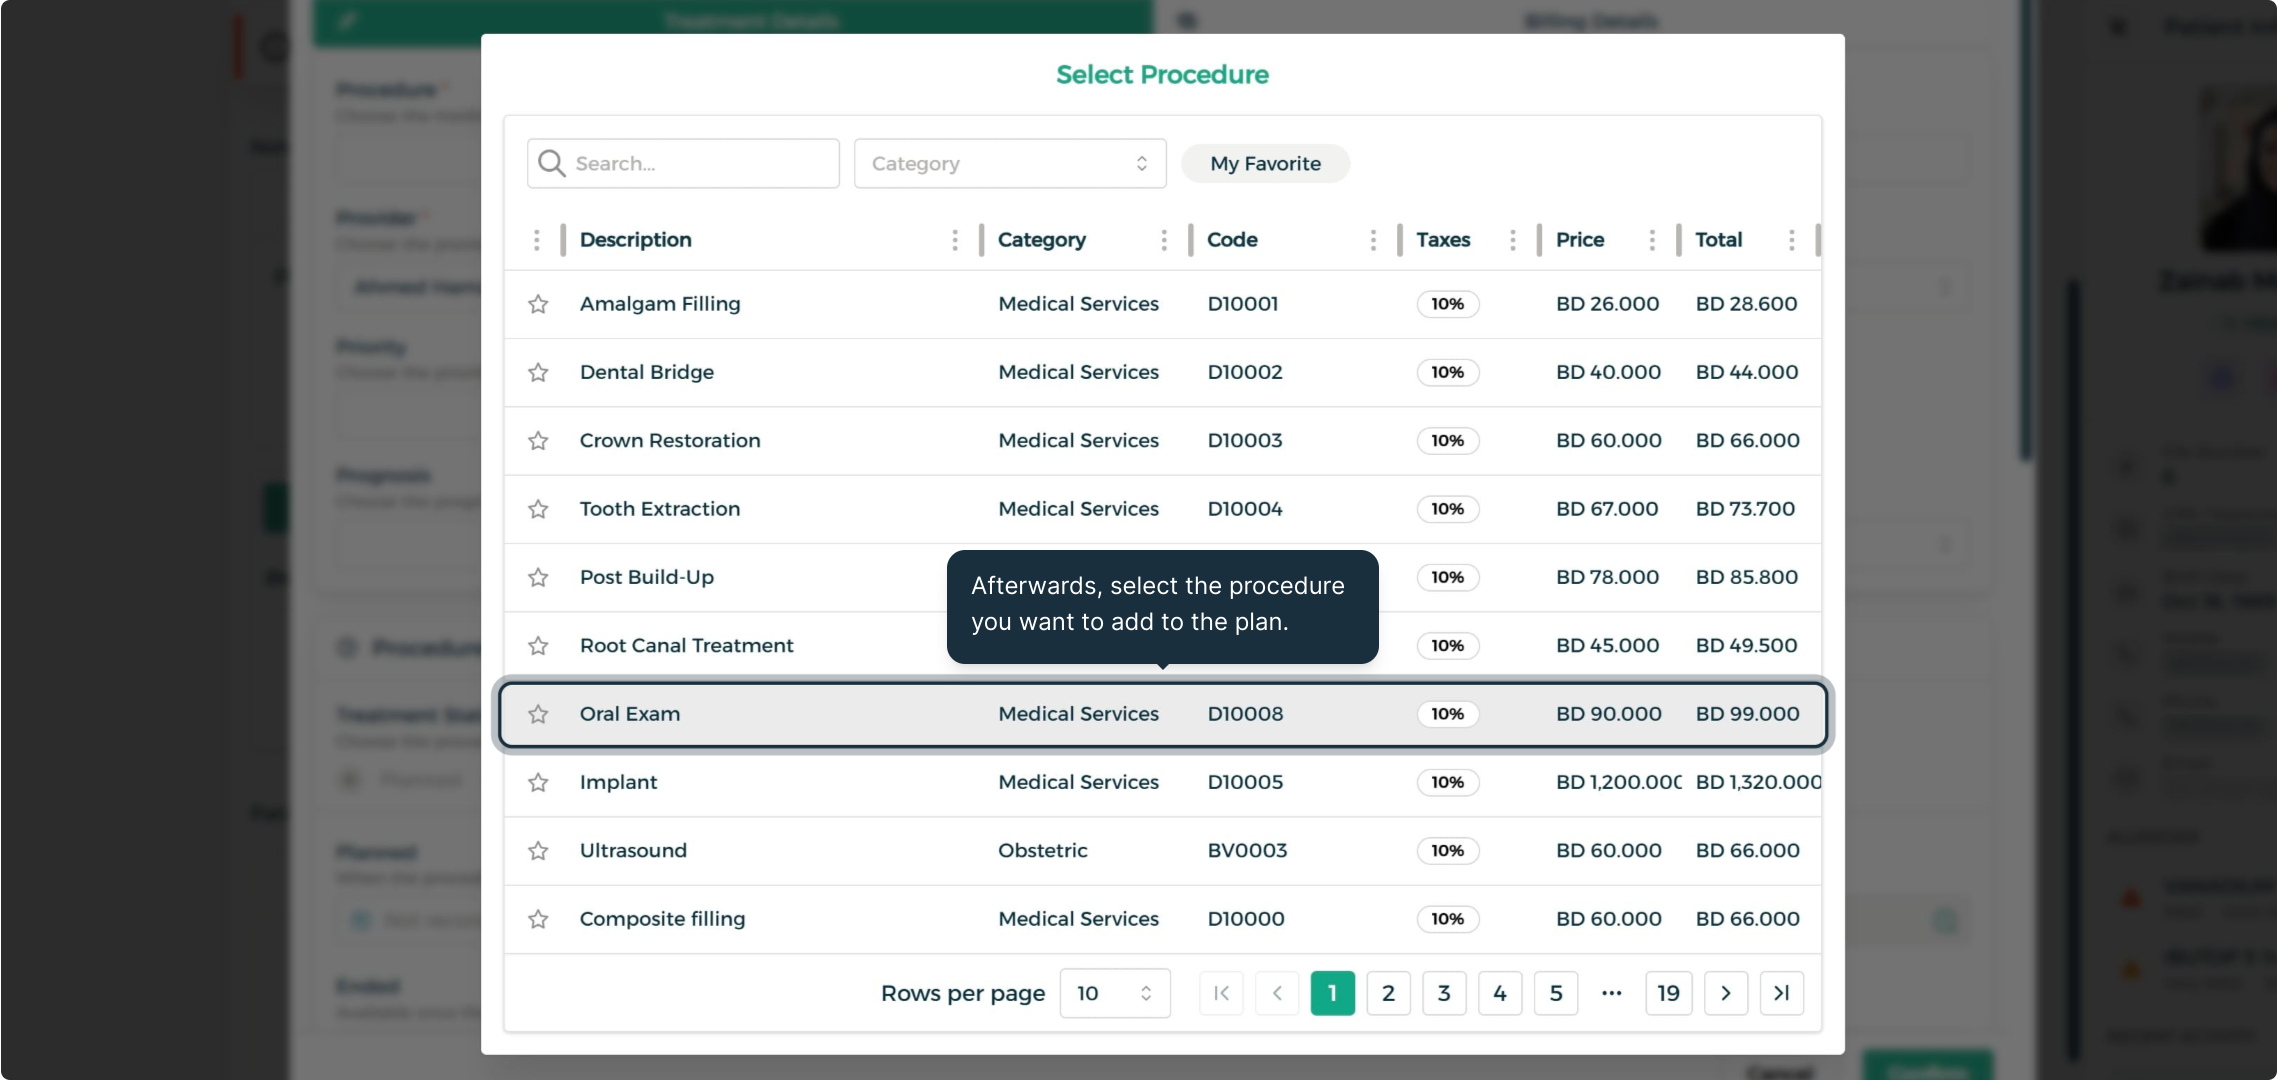
Step 2: Select a Procedure
Click the Procedure field to open the catalogue, then choose the procedure to add. The provider and place of service are filled in automatically.
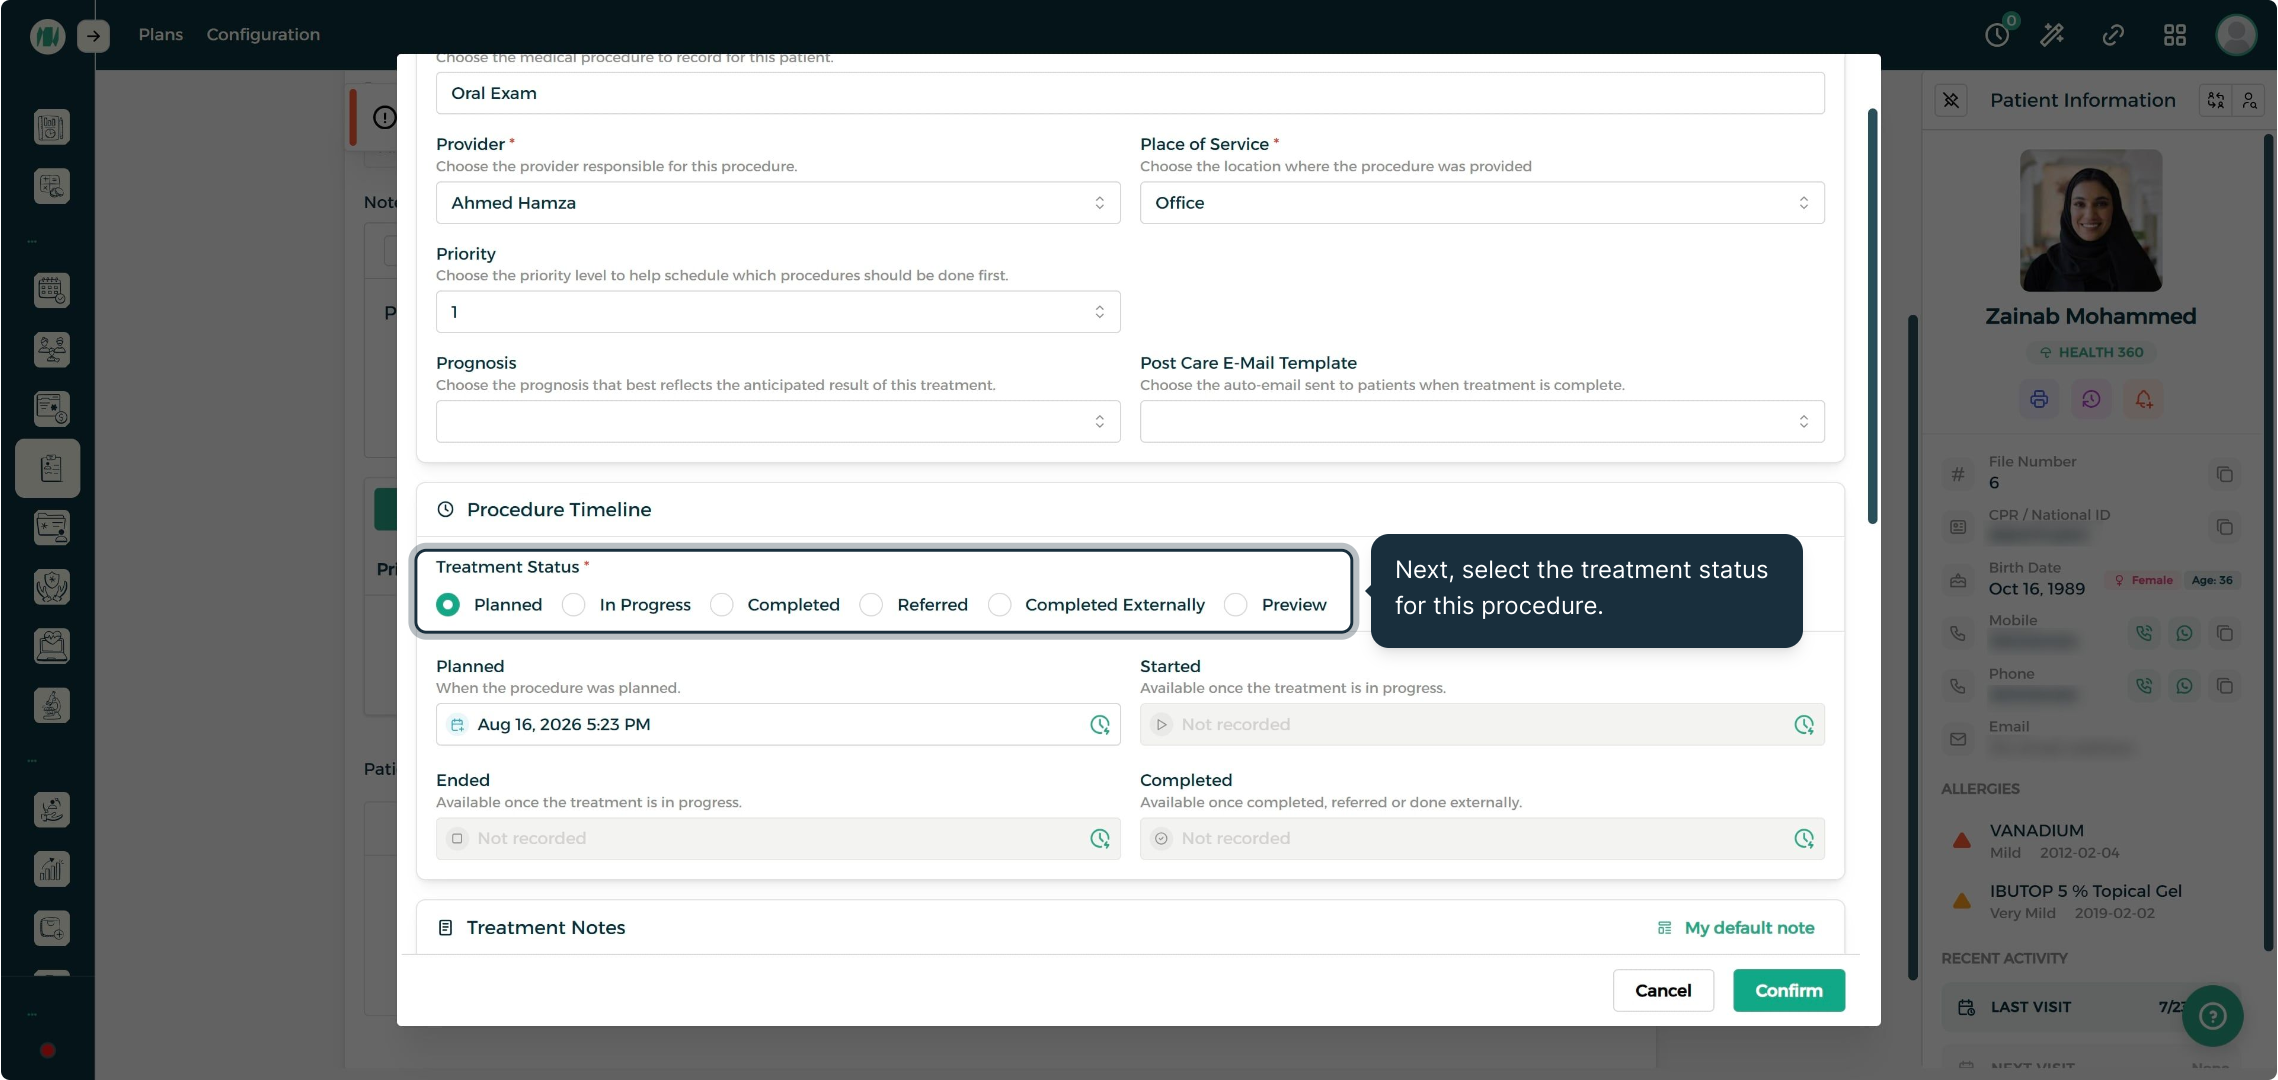
Step 3: Set Priority and Treatment Status
Choose a Priority to sequence the procedure against the rest of the plan, then set the Treatment Status to reflect where the procedure currently stands.
Adding Procedures — Billing Details
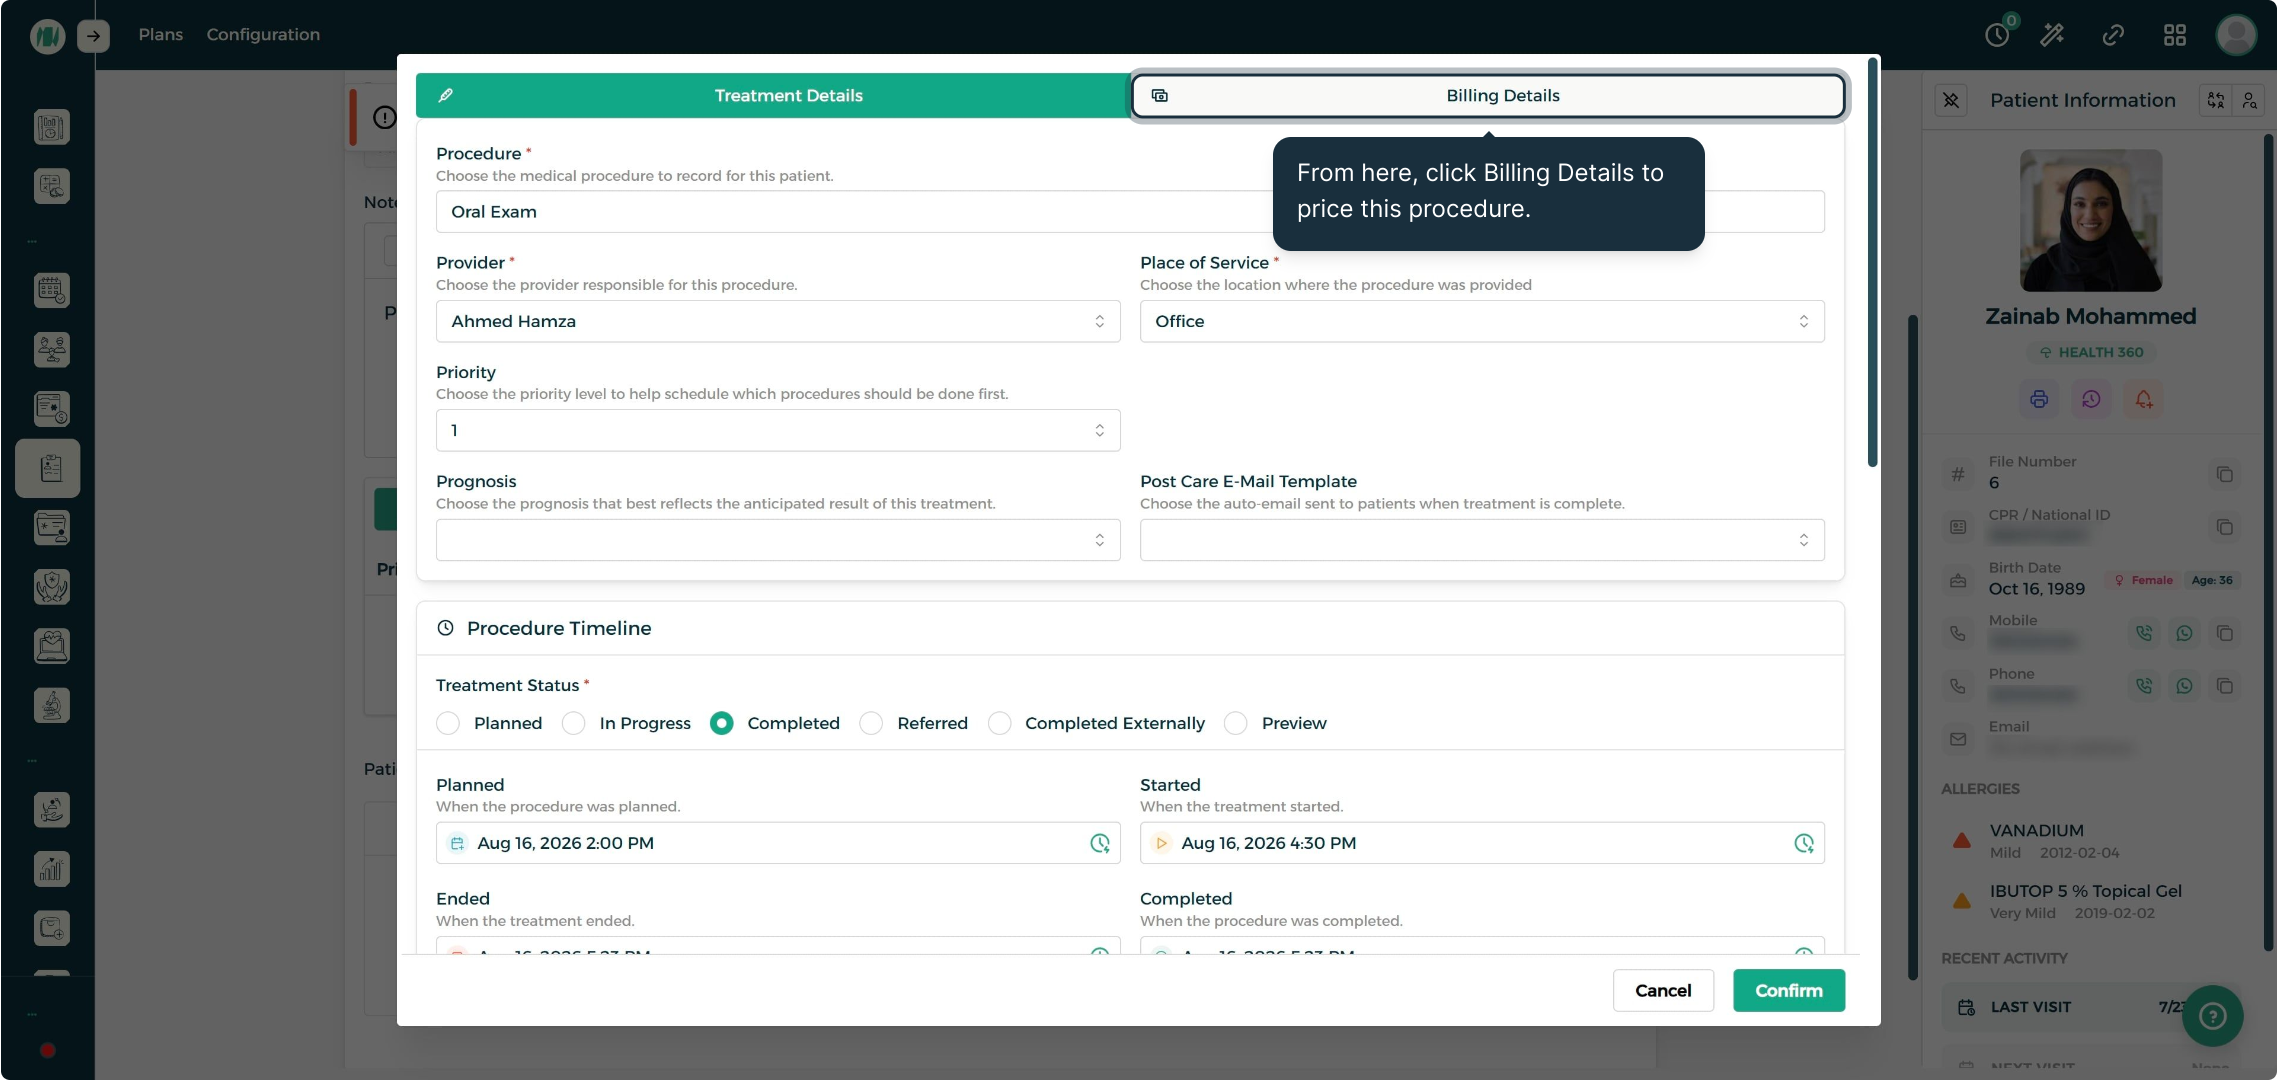
Step 1: Open Billing Details
From the procedure editor, click the Billing Details tab to price the procedure.
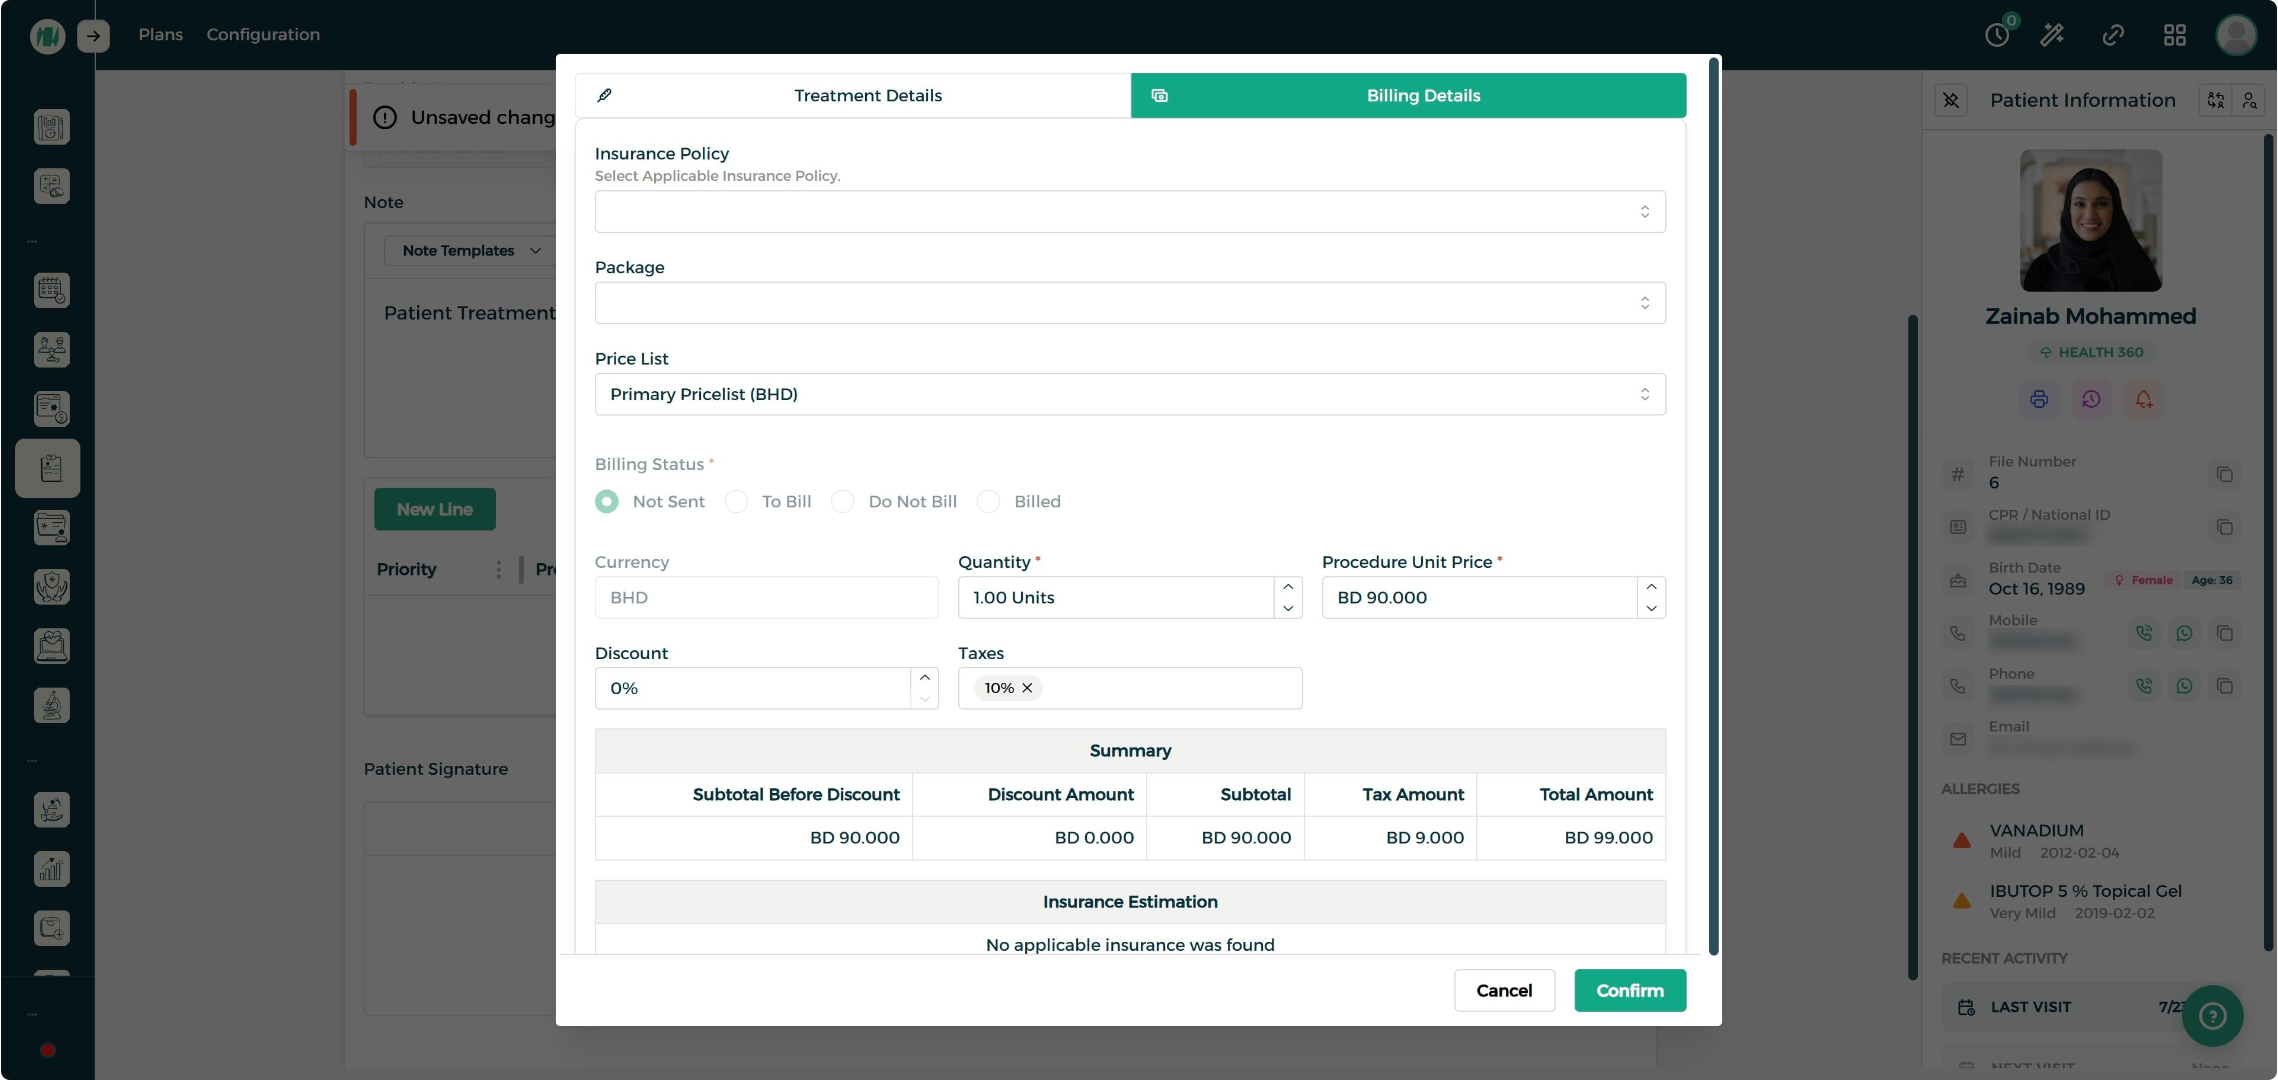
Step 2: Review Pricing and Confirm
Adjust the insurance policy, price list, discount, and taxes as needed. Review the subtotal, tax, and total in the summary, then click Confirm to add the procedure to the plan.
Patient Signature
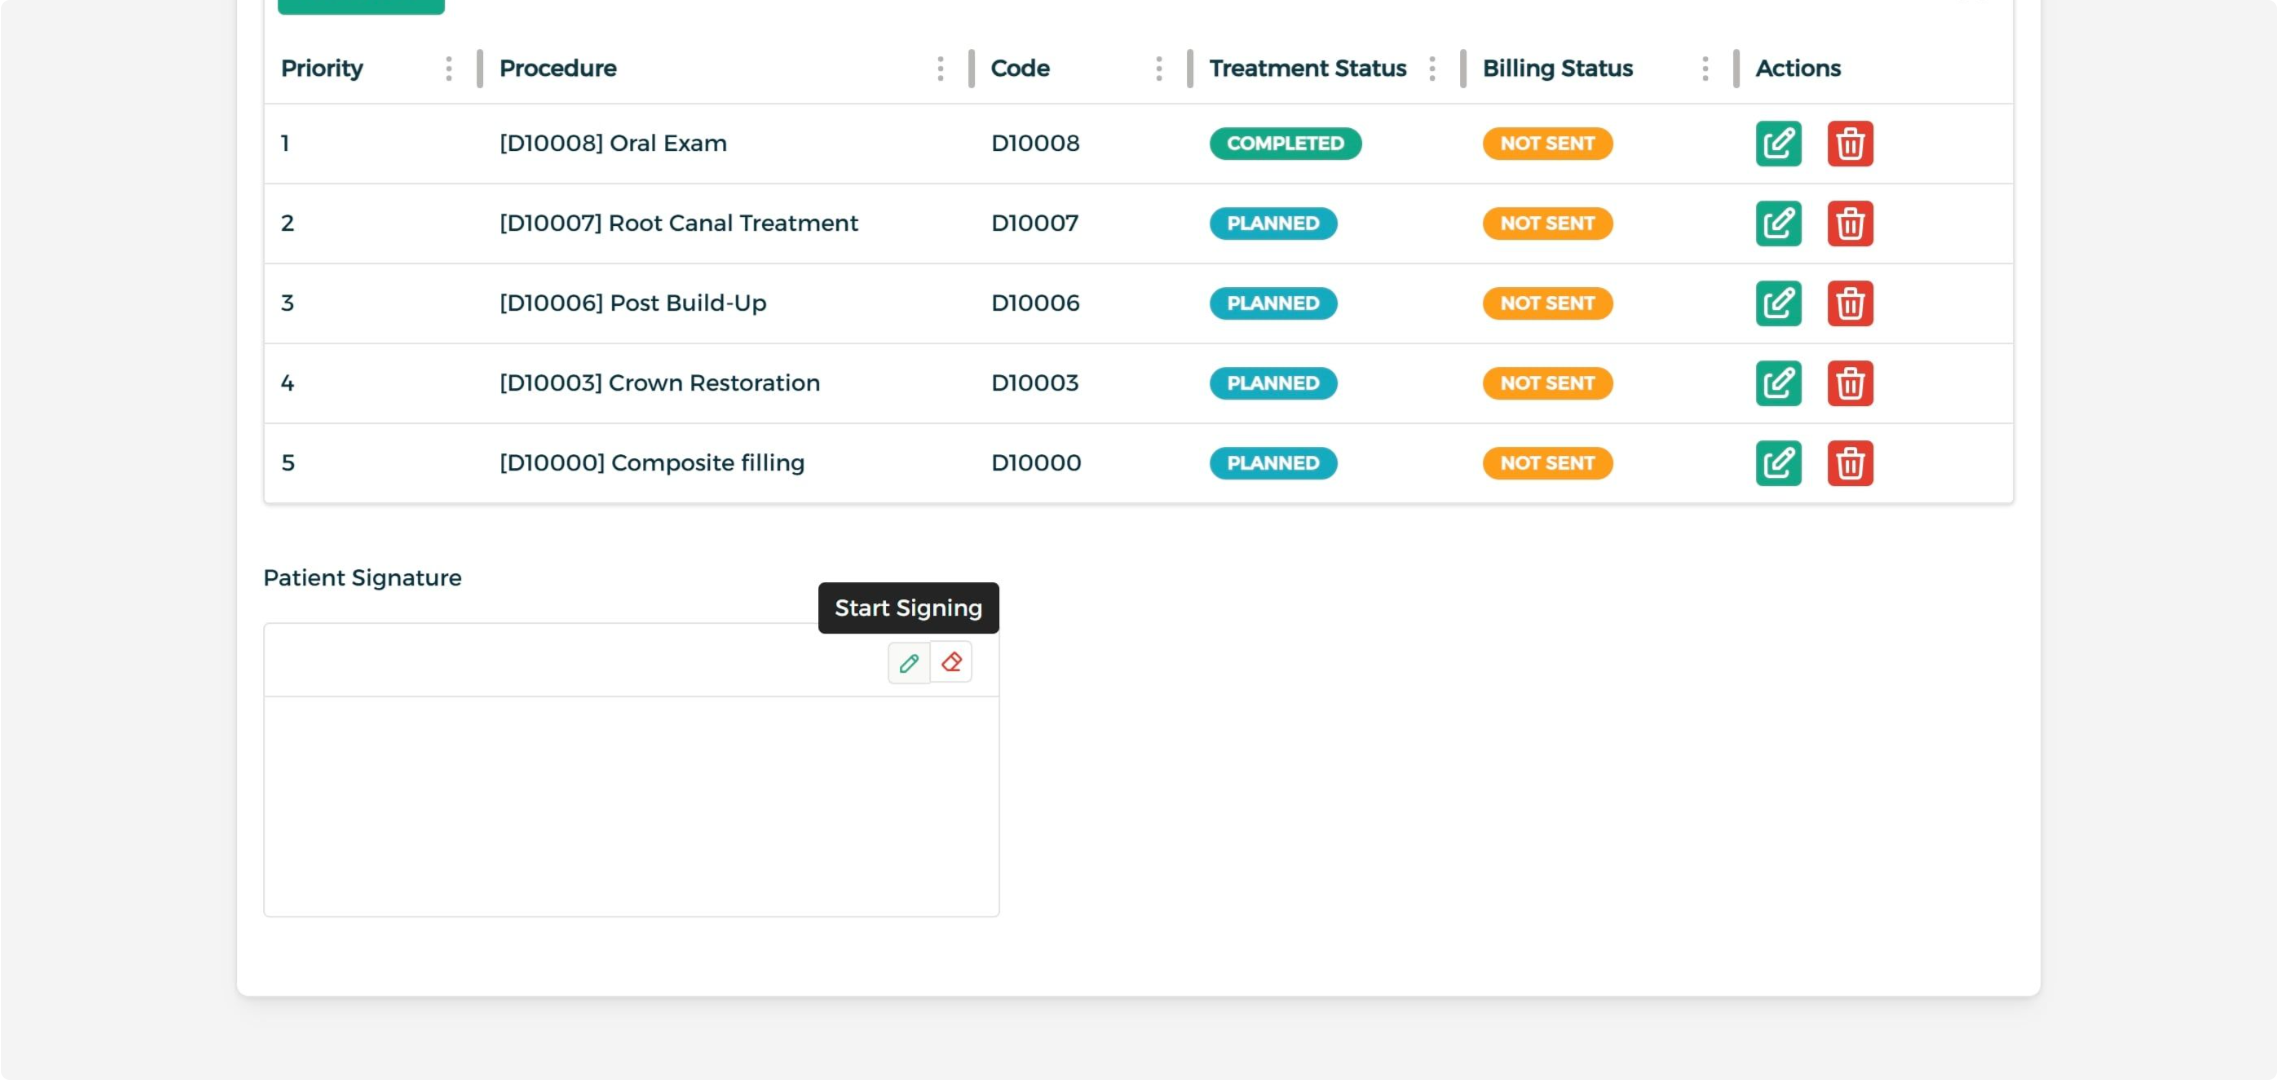
Step 1: Begin Signing
Scroll to the Patient Signature panel — consent can be captured directly on screen or through a connected signature device.
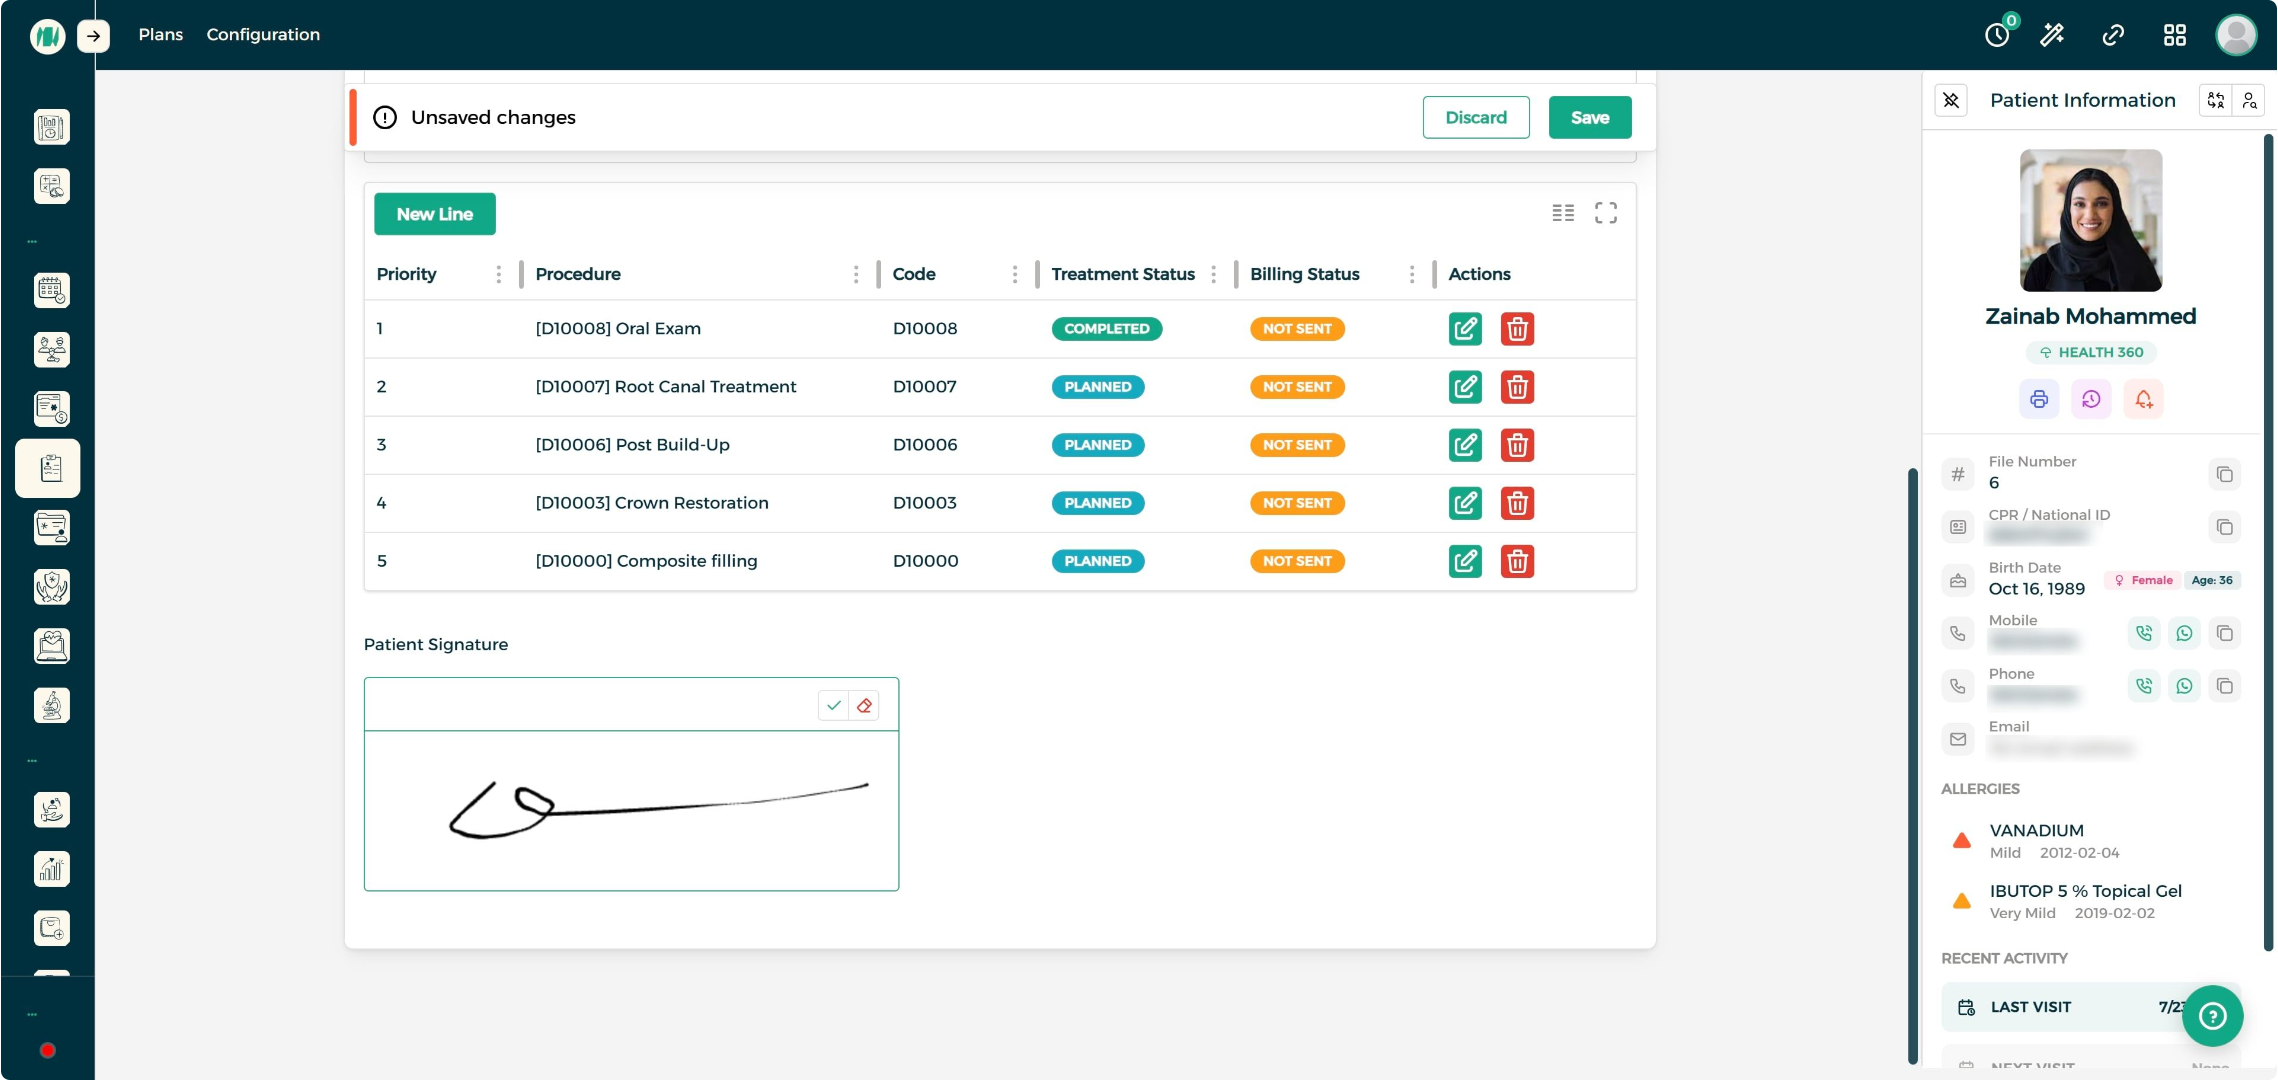
Step 2: Signature Captured
Once signed, the signature is saved directly on the plan as part of the patient's record.
Printing the Treatment Plan
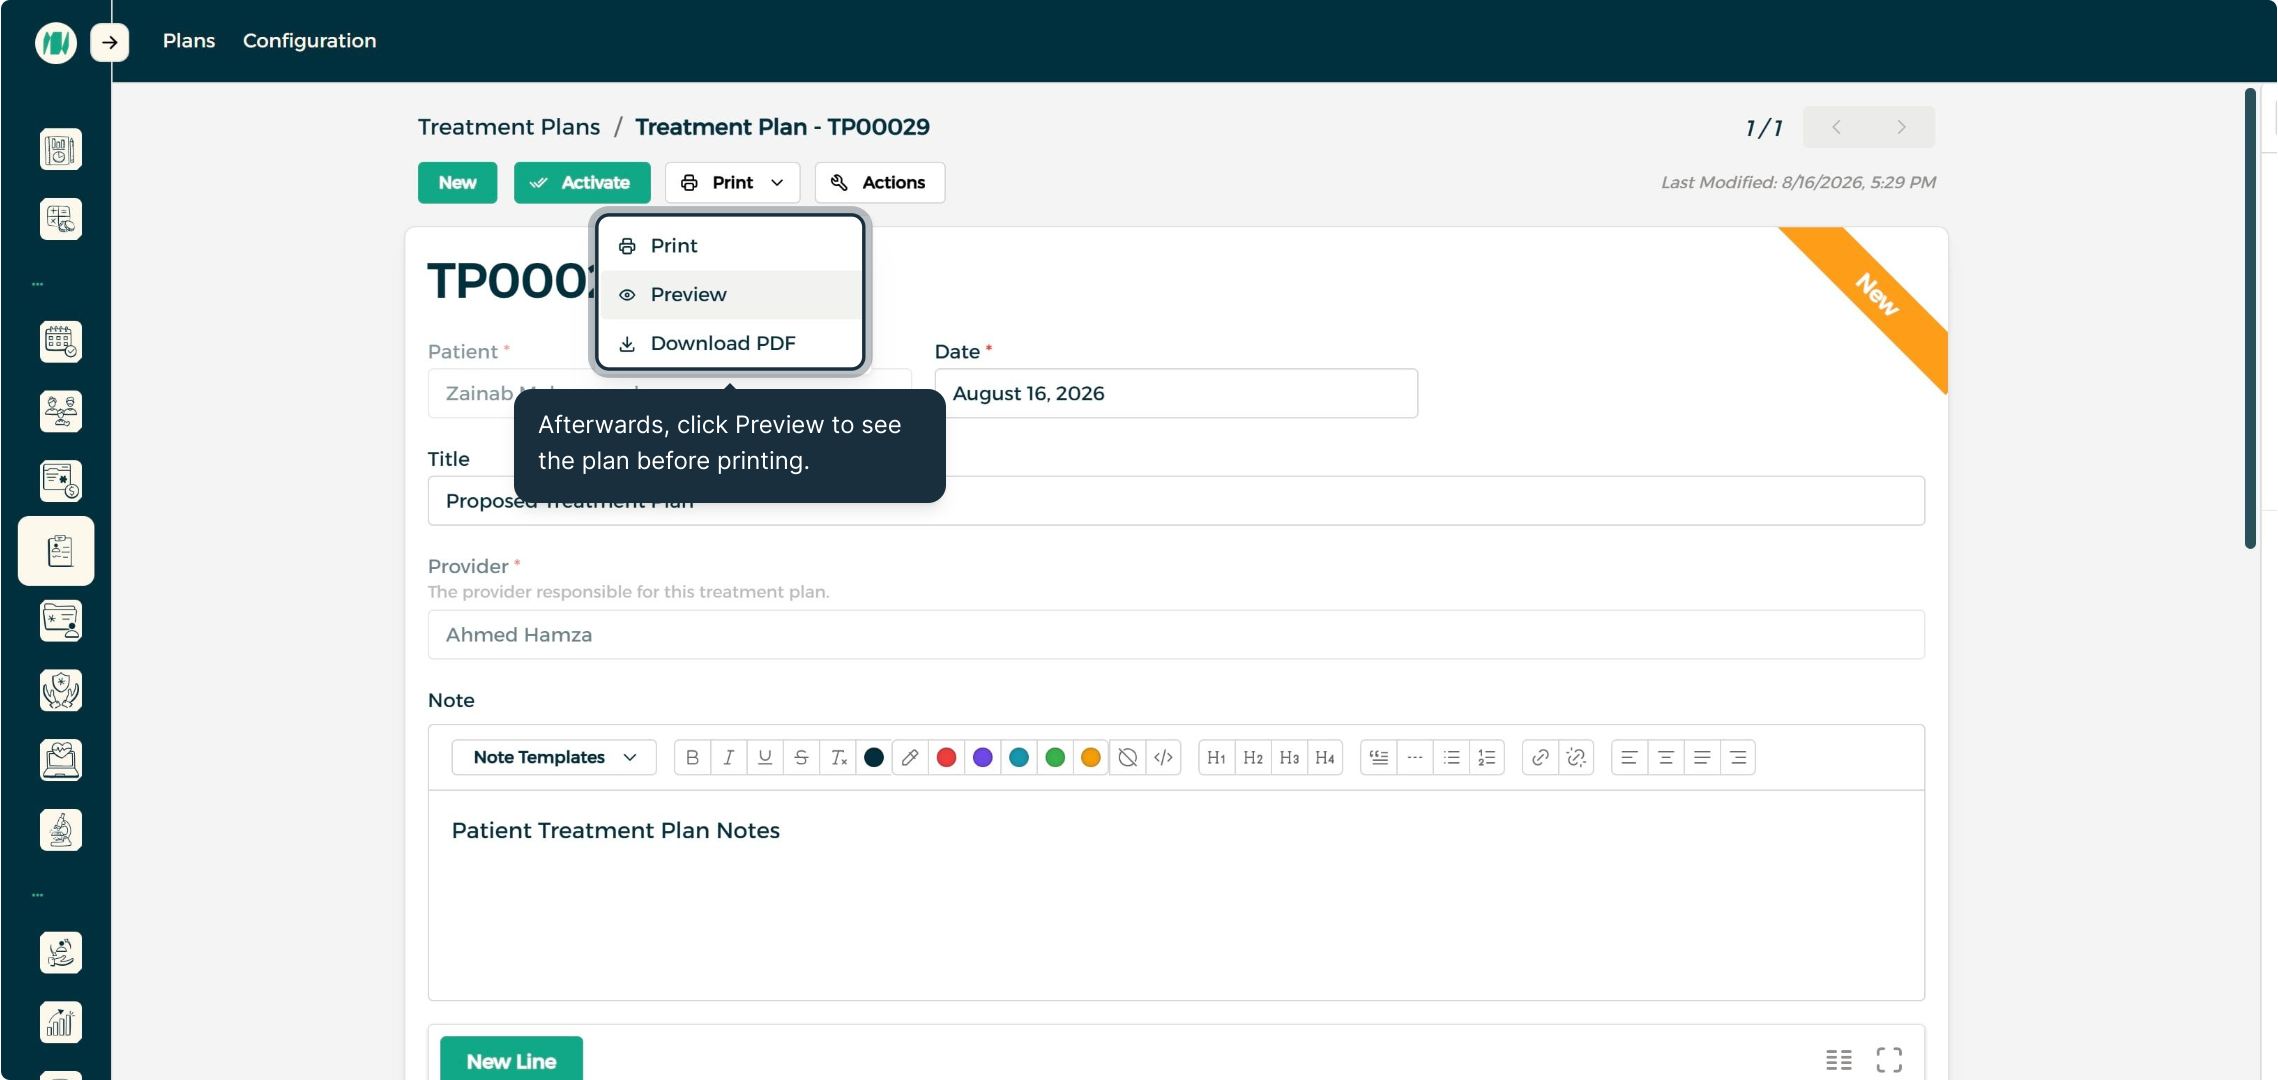
Step 1: Preview the Plan
Click Preview from the Print menu to see exactly what the patient will receive before printing.
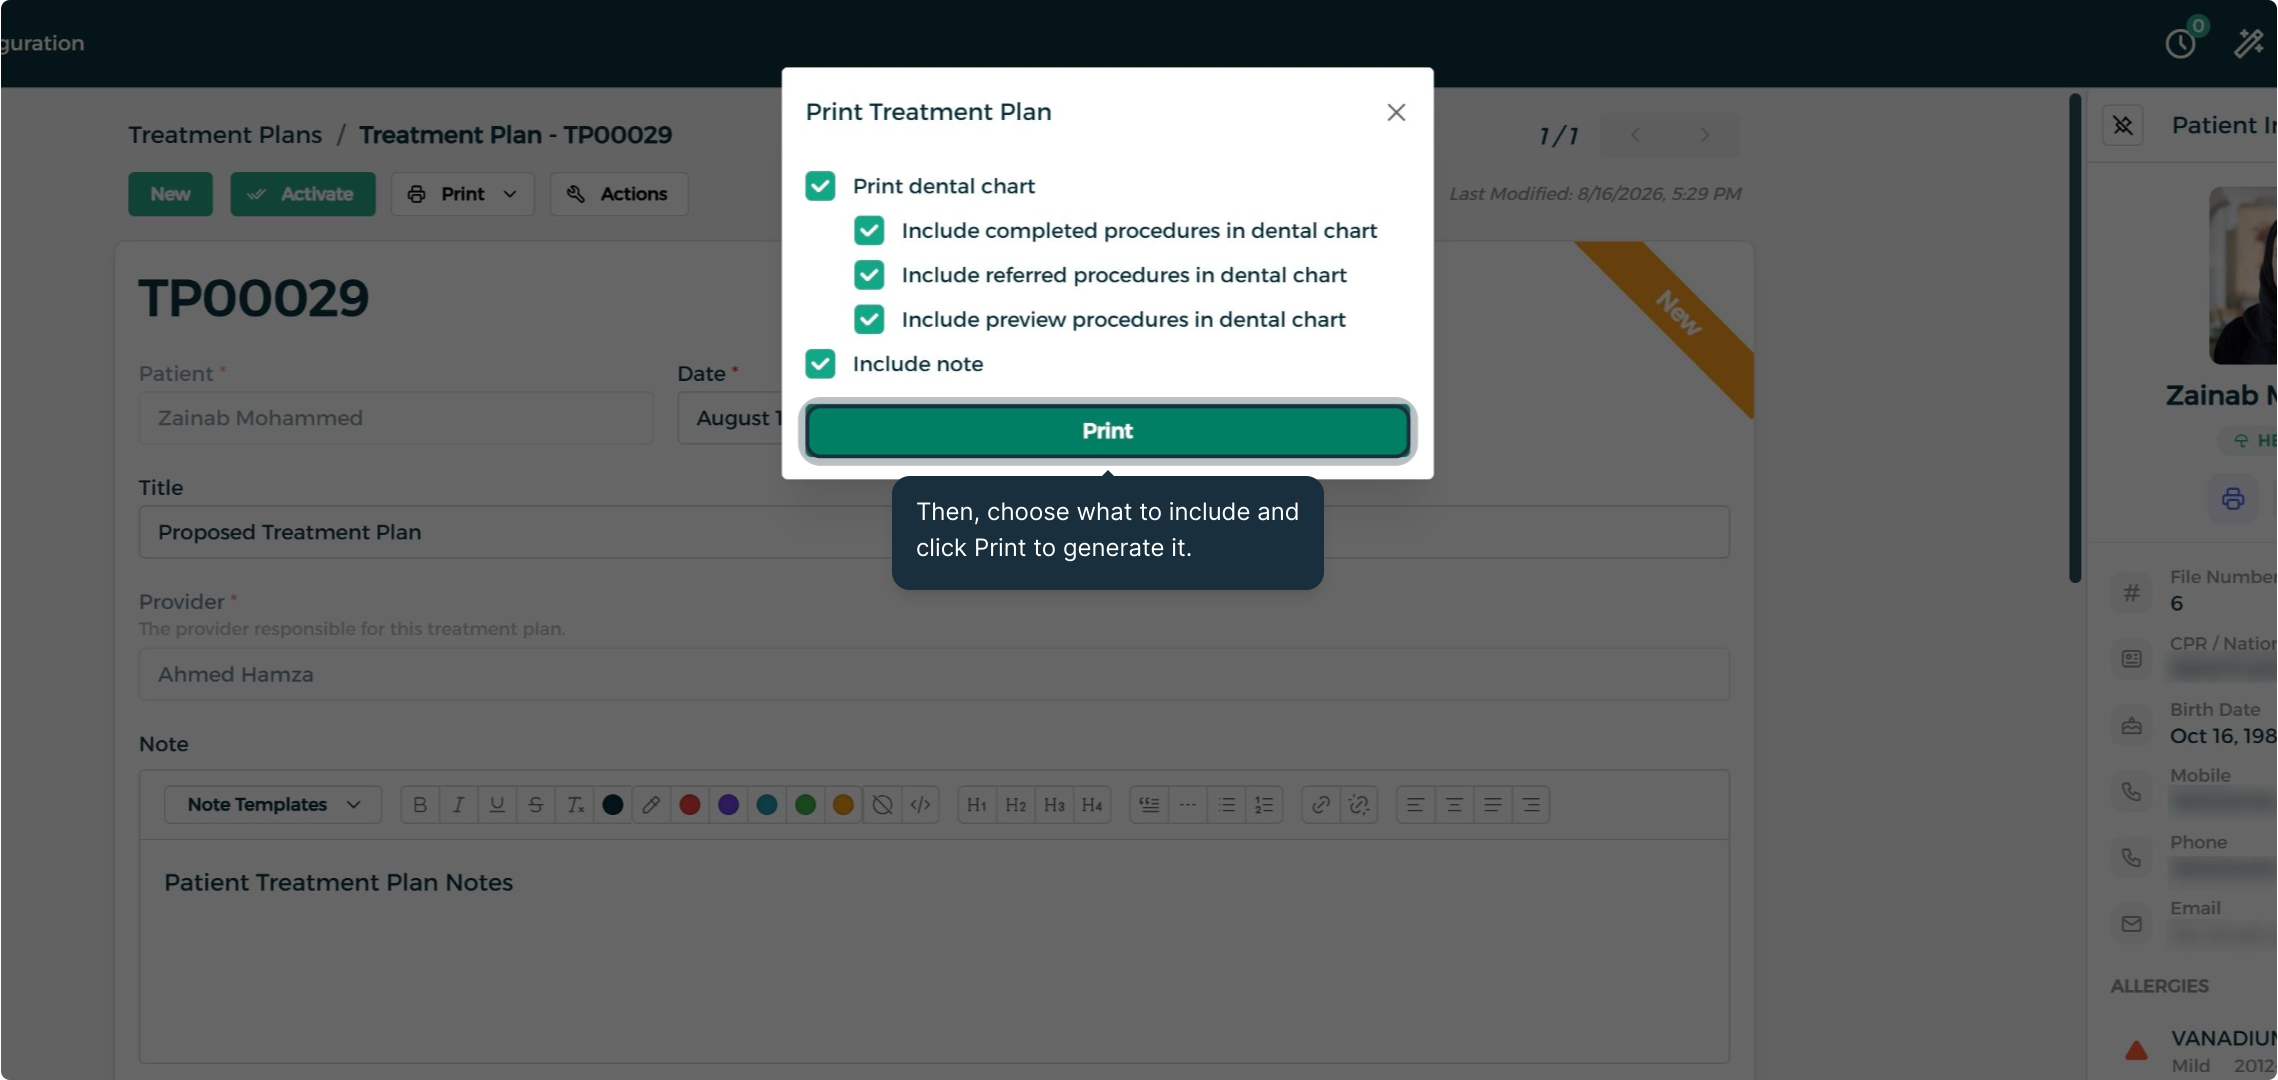
Step 2: Choose What to Include
Select whether to include the dental chart and the plan note, then click Print to generate the document.
Step 3: Review the Printable Summary
The generated document includes patient details, a visual tooth chart, and a full breakdown of procedures and costs — ready to print, download, or open in a new tab.
Activating the Plan
Step 1: Activate the Plan
Once the plan is ready, click Activate to mark it as accepted by the patient and put it into effect.
Configuring Treatment Plan Priorities
Step 1: Open Treatment Plan Priorities
From Configuration, select Treatment Plan Priorities to manage the clinic's priority labels.
Step 2: Create a New Priority Level
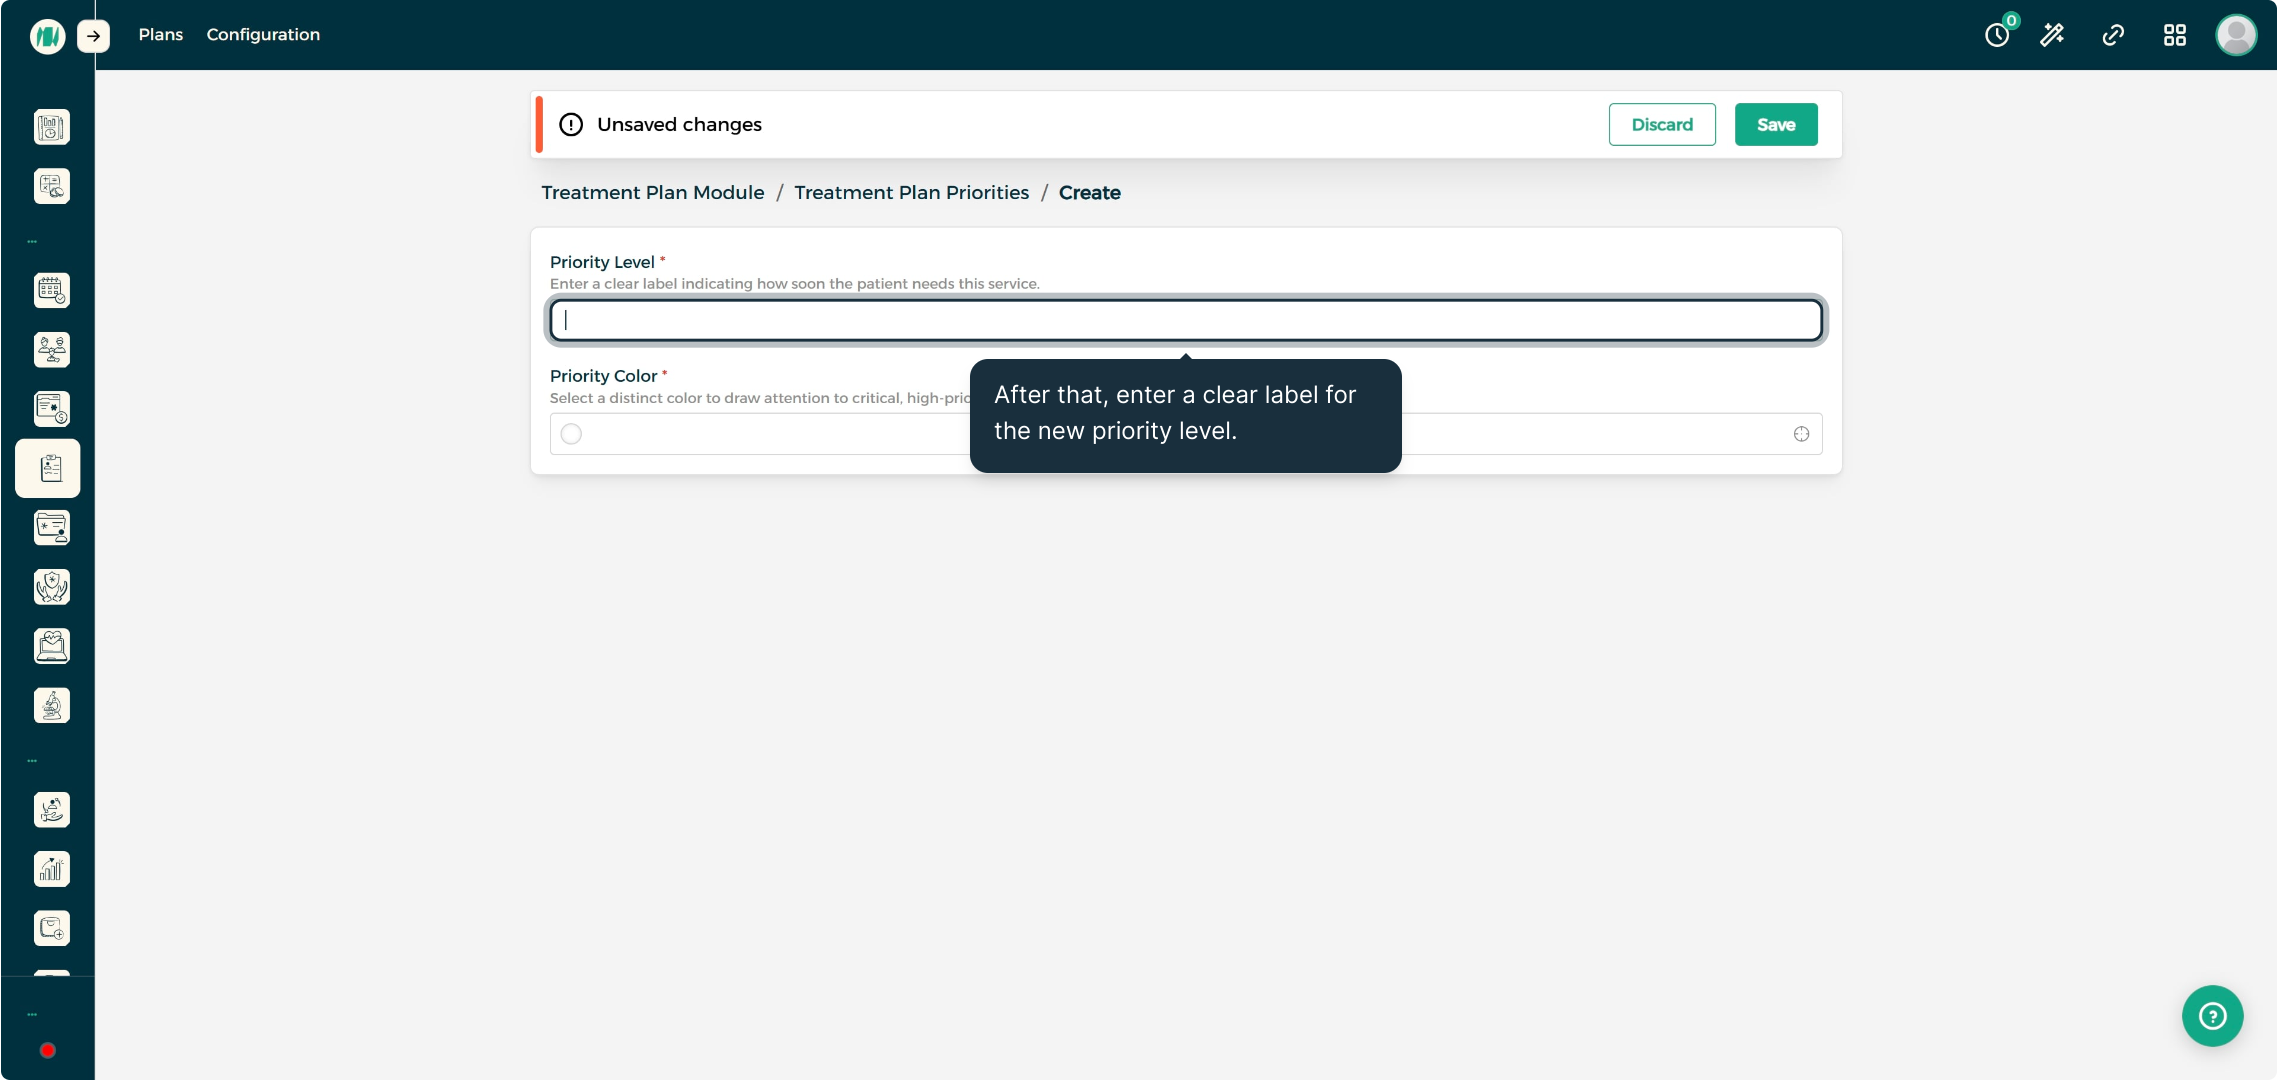
Click Add New, enter a clear label indicating how soon the patient needs the service, and choose a distinct color.
Step 3: Reorder Priorities
Click Change Ordering, drag priorities into the order you want, then click Exit Ordering Mode to save the new sequence.
End-to-End Workflow
- Open the patient's Treatment Plans tab and click Add New.
- Set the plan date, title, and note.
- Add each procedure: select it from the catalogue, set its priority and treatment status, and price it under Billing Details.
- Capture the patient's signature to record consent.
- Preview and print the plan, optionally including the dental chart.
- Activate the plan once the patient accepts it.
- Manage and reorder custom priority labels under Configuration as needed.
Best Practices
- Keep titles descriptive. A clear plan title makes it easy to find the right plan later, especially for patients with multiple plans over time.
- Set treatment status as you go. Updating each procedure's status (Planned, In Progress, Completed, Referred) keeps the timeline accurate for reporting and patient communication.
- Use priority labels consistently. Configuring a shared set of priority levels helps every provider in the clinic sequence procedures the same way.
- Capture signature before printing. Getting patient consent first ensures the printed or downloaded copy reflects a fully accepted plan.
- Review billing details per procedure. Insurance, discounts, and taxes are set at the procedure level, so double-check each line before confirming.
FAQ
Q: Can I add more than one procedure to a treatment plan? Yes. Click New Line as many times as needed — each procedure gets its own Treatment Details and Billing Details tabs.
Q: What happens when I set a procedure's Treatment Status to Completed? The Started, Ended, and Completed timestamps become available so you can record exactly when the procedure took place.
Q: Can the patient sign on a device other than the screen? Yes. The Patient Signature panel supports both on-screen signing and connected signature devices.
Q: What's included when I print a treatment plan? The printed summary includes patient details, the plan note (optional), a visual dental chart (optional), and a full breakdown of procedures, quantities, discounts, taxes, and totals.
Q: Does activating a plan lock it from further edits? Activating marks the plan as accepted by the patient and puts it into effect; further procedure or billing changes should be made with care since the plan is now considered in force.
Q: Where do I manage treatment priority labels? Under Configuration → Treatment Plan Priorities, where you can add, color-code, and reorder priority levels for the whole clinic.
Q: Can I change the order of priority levels after creating them? Yes. Use Change Ordering in the Treatment Plan Priorities screen to drag levels into the order you want, then exit ordering mode to save.